Greetings, hungry humans! I’m here, with dinner ideas with ground beef that are so delicious, they’ll surely ‘meat’ all your expectations!
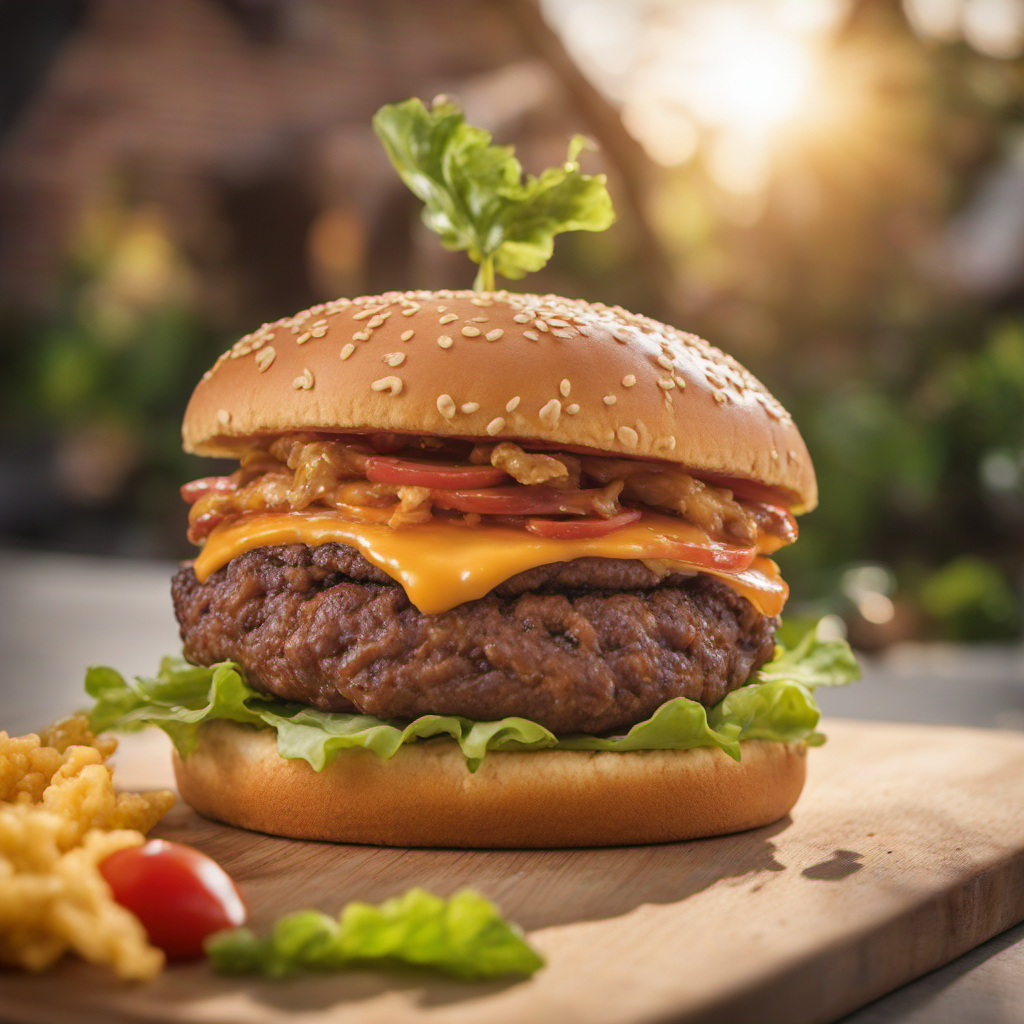
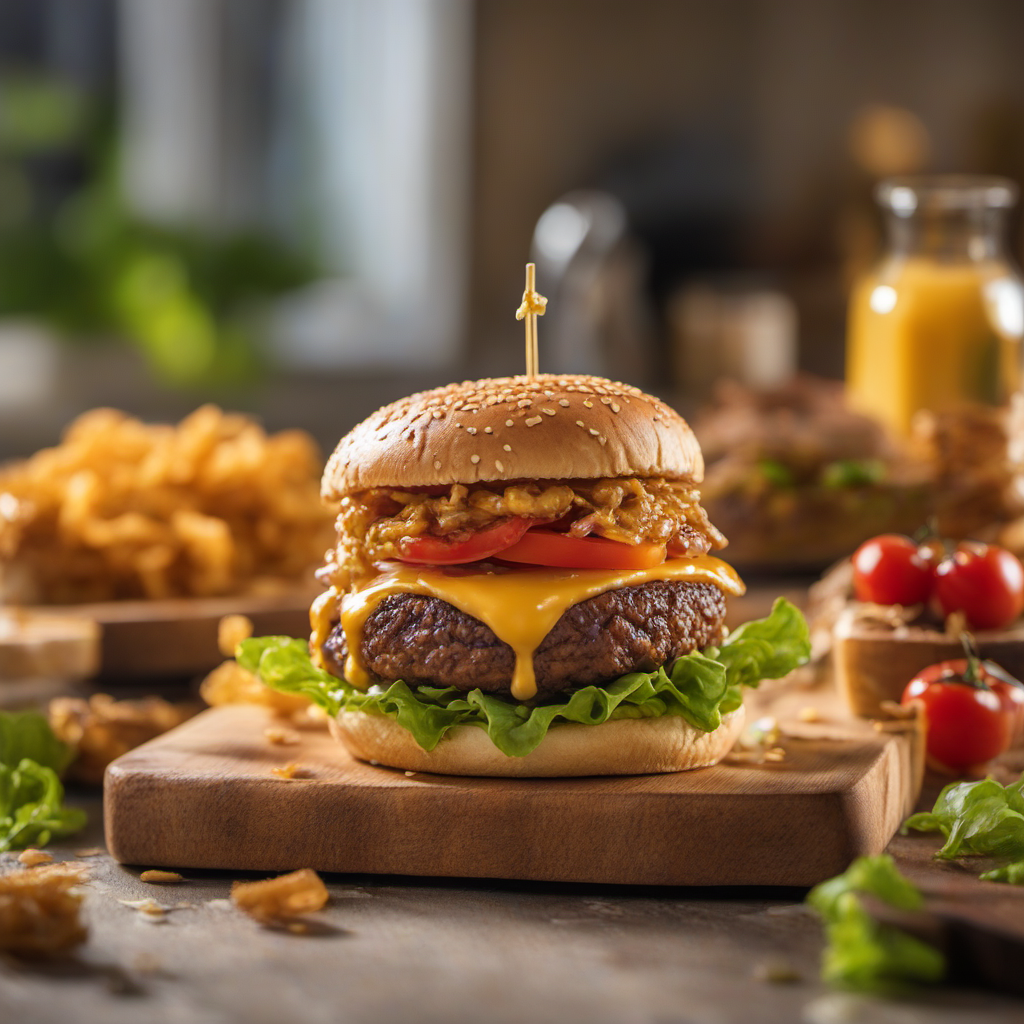
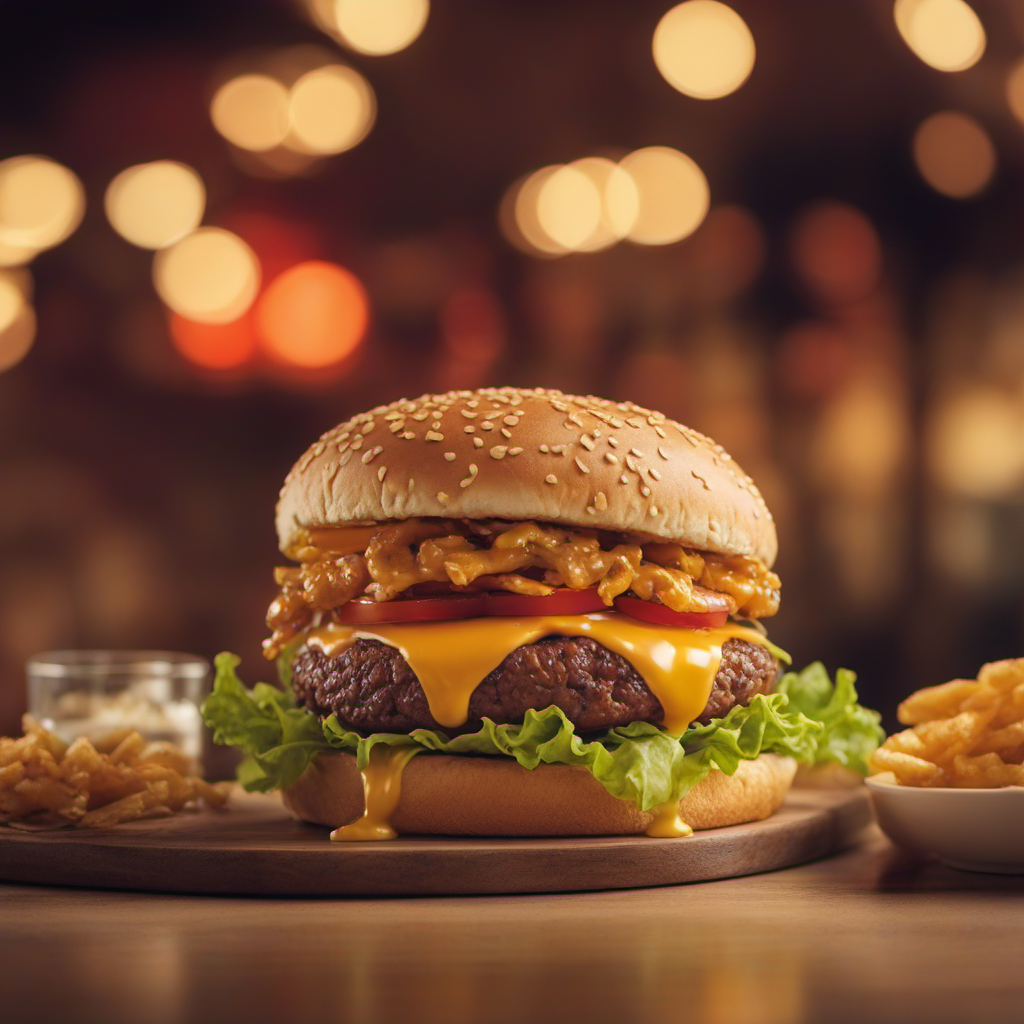
What’s up today? A burger! Not just any burger, mind you. This dinner idea with ground beef has been through more trials and errors than my first attempt at using a smartphone. Remember when everyone thought putting pineapples on a burger was “innovative”? Ha! Those were the days.
Speaking of history, did you know the classic cheeseburger has roots going way back to the early 20th century? Amid all the dinner ideas with ground beef, it has stood out as a timeless favorite. While many debate its origins, we’re here to perfect it.
Working with ground beef is like molding clay. Except this is clay that sizzles, smells delightful, and fills your tummy with joy. Over the years, I’ve had my fair share of beef blunders. But, every failure is just a stepping stone to delicious success.
Now, about this burger. “Make It Right or Don’t Bother” isn’t just a sassy statement; it’s a mantra. The infusion of balsamic vinegar and garlic makes it seem like the beef went on a gourmet vacation. And the cheese core? Pure bliss.
I remember the first time I nailed this recipe. The sun was setting, the grill was hot, and that first bite? Magic. It took me back to summer BBQs and the simple joys of a well-cooked meal.
In a world full of food fads, this dinner idea with ground beef keeps it classic, easy, and oh-so-tasty. Whether you’re cooking for family, friends, or just treating yourself, this burger is the star.
Now, without further ado, embark on this gourmet journey! And remember, life’s too short for average burgers. 🍔
The Ingredients
1 pound ground beef (80% lean, 20% fat)
4 small chunks of blue cheese or gouda
4 hamburger buns
Aged balsamic vinegar
2 garlic cloves, minced
Fresh herbs (rosemary or thyme), finely chopped
Salt and freshly ground pepper, to taste
Lettuce (preferably iceberg for its crispness)
1 ripe tomato, sliced
1 red onion, sliced into rings
Pickles (optional)
Condiments: Mustard, ketchup (optional)
The Directions
In a mixing bowl, combine ground beef, minced garlic, and finely chopped herbs. Mix well.
Divide the beef mixture into 4 equal parts. Form each portion into a patty. Embed a chunk of cheese in the center of each patty, ensuring it’s completely covered by beef.
Marinate the patties in aged balsamic vinegar for at least 30 minutes.
Preheat the grill or stovetop pan over medium-high heat.
Season the marinated patties with salt and pepper.
Place the patties on the grill or pan, cooking for about 4-5 minutes on each side or until desired doneness is achieved.
Toast the hamburger buns on the grill or pan for about 1 minute or until they’re slightly golden.
Assemble the burger: Start with the bottom bun, followed by lettuce, the gourmet patty, tomato, onion rings, pickles (if using), and condiments of choice. Cap it off with the top bun.
Serve immediately and relish the elevated flavors of this gourmet cheeseburger.
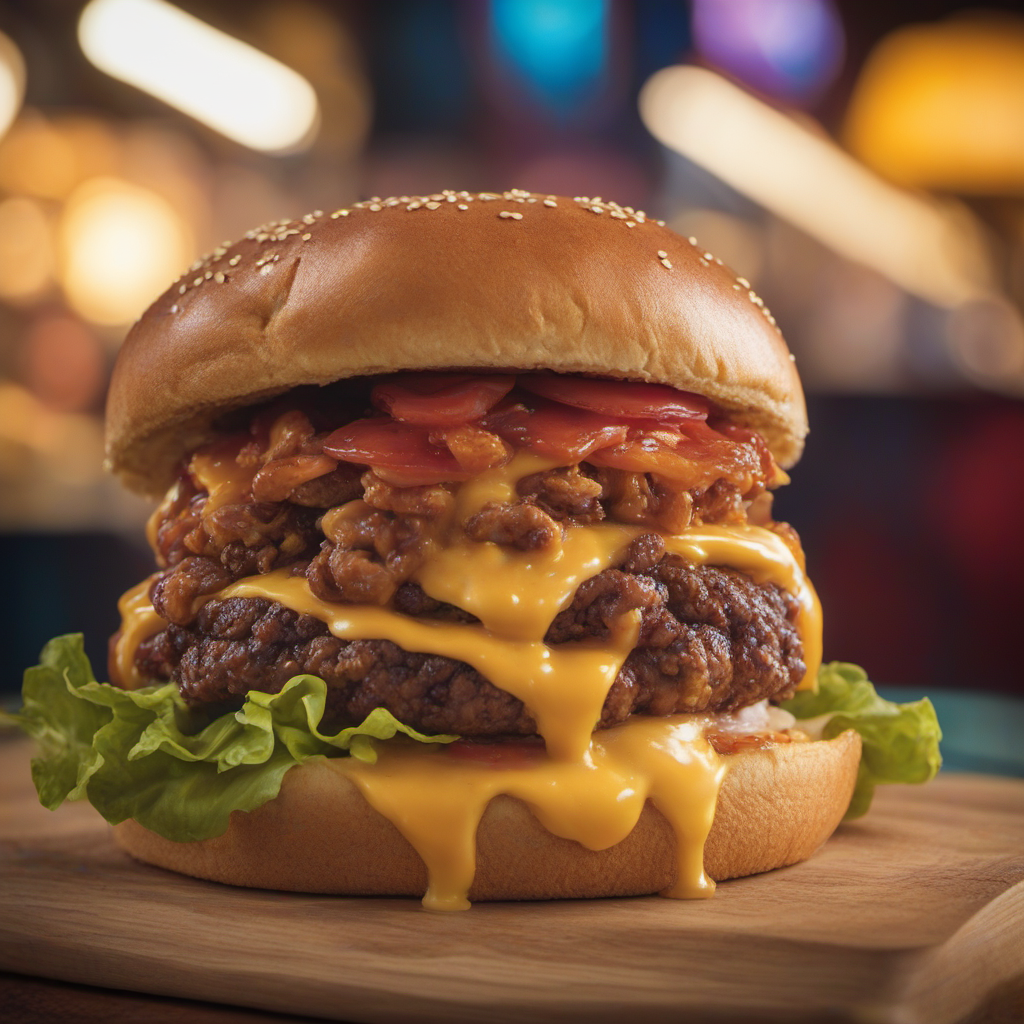
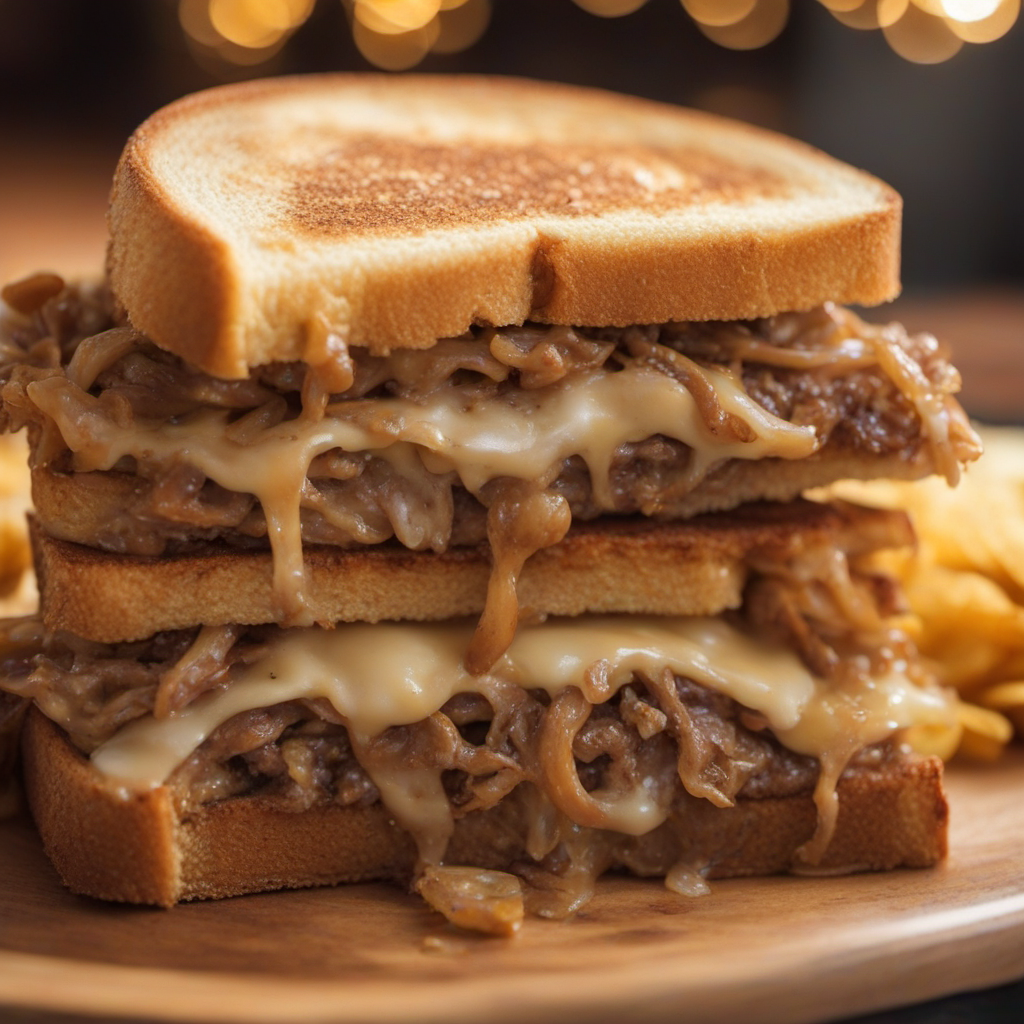
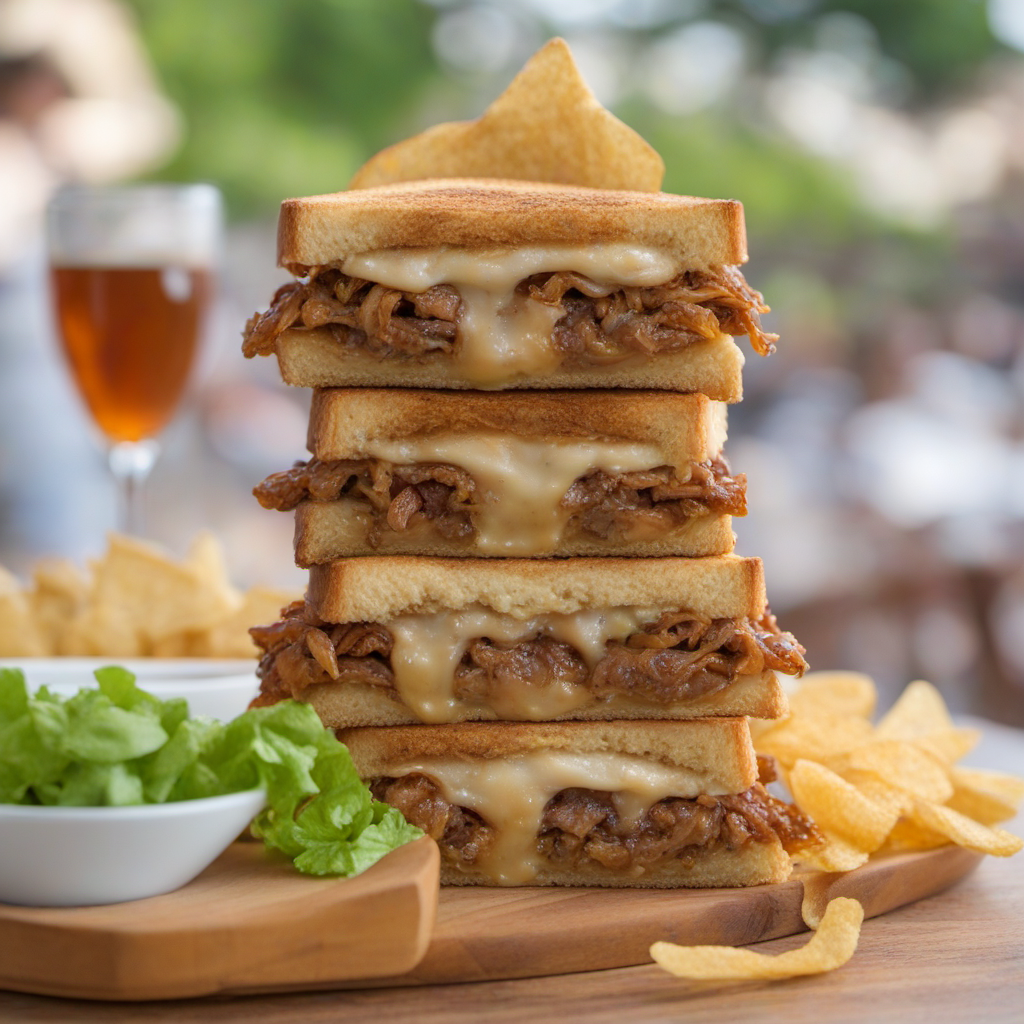
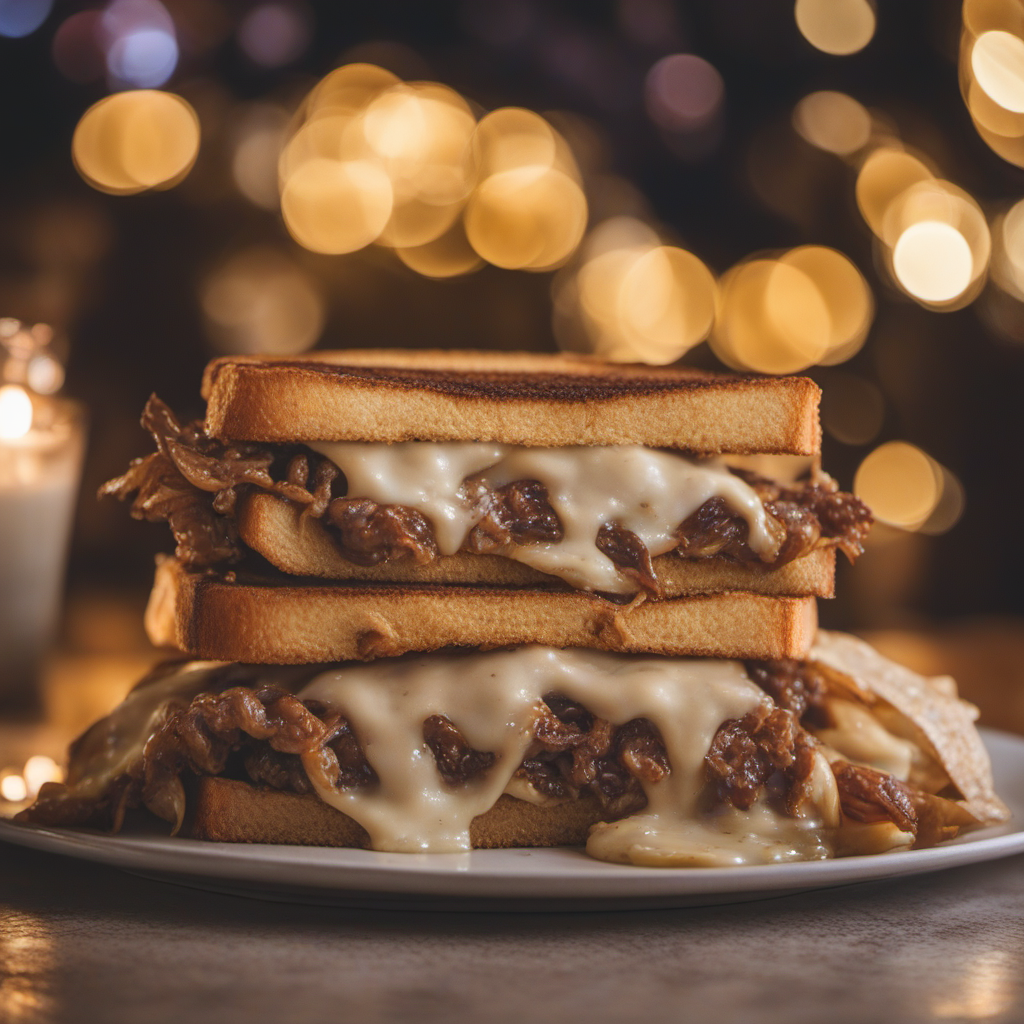
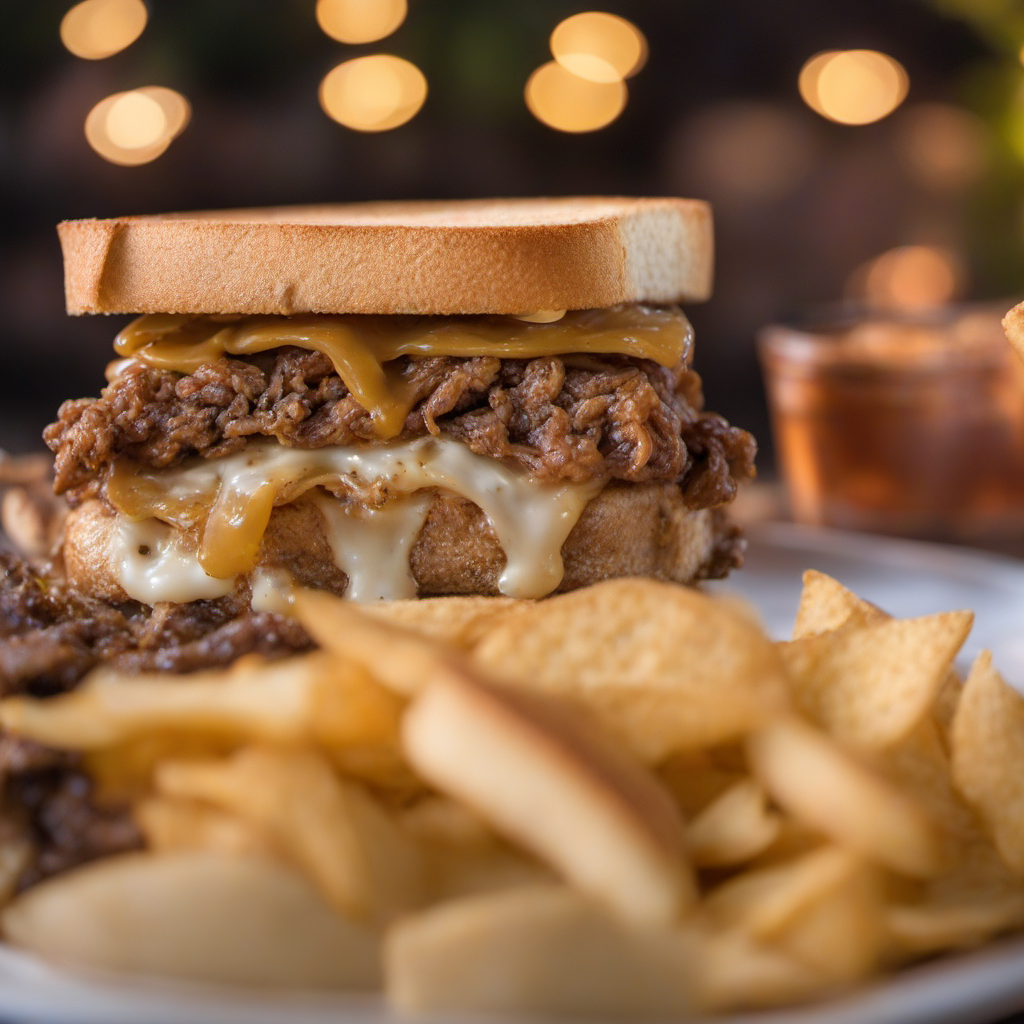
Ah, the Patty Melt. A sandwich that’s seen more variations in my kitchen than my grandkids’ hairstyles. Now, I’m no food historian, but I’ve been around the block long enough to know a thing or two. So, grab your apron and reading glasses, and let’s dive into the cheesy chronicles of the Golden Era Patty Melt.
Back in the day, sometime between Elvis’s hip gyrations and the advent of color television, the Patty Melt was born. Why? Well, some genius (probably with too much time and rye bread on their hands) decided to bridge the gap between the hamburger’s meaty goodness and the grilled cheese’s melty marvel. The result? A sandwich that screams, “America!”
Now, I’ve had my fair share of experiences with these ingredients. Rye bread and I? We go way back. I remember the time I tried using sourdough instead. Let’s just say it was a bigger flop than disco music. And don’t get me started on my experiments with mozzarella. Who knew cheese could be so… stretchy? Nearly lost an eyebrow that day.
Over the years, my Golden Era Patty Melt ranged from charcoal-brick disasters (perfect for home defense, not so much for eating) to the masterpiece I serve now. I’ve had meltdowns, both in the skillet and emotionally. Remember that time I forgot the onions and replaced them with pickles? Yeah, let’s never talk about that dark period again. But hey, as they say, the road to the perfect Patty Melt is paved with botched beef and burnt bread.
Ah, the memories. Like that summer evening in ’92 when my Patty Melt was the star at the family picnic. Little Tommy took his first bite and declared, “Grandpa, this tastes like…food!” High praise, indeed.
So, why am I sharing my top-secret, generations-perfected recipe now? Because it’s too darn delicious to keep to myself. But also, so you young whippersnappers can avoid my culinary missteps. Consider it my act of public service.
Go on, give the Golden Era Patty Melt a whirl. And if yours turns out better than mine, well, just remember who taught you.
The Ingredients
8 slices of rye bread
4 ground beef patties (1/4 lb each)
2 cups of caramelized onions (see Quick Caramelized Onions for Patty Melt recipe below)
4 slices of Swiss cheese
4 slices of cheddar cheese
Butter (unsalted, softened)
Salt and pepper to taste
Optional: A touch of Dijon mustard or Thousand Island dressing for an extra kick
The Directions
Preheat a skillet or griddle over medium heat.
Season the beef patties with salt and pepper on both sides.
Cook the patties to your preferred doneness, flipping once. For a medium patty, this will take about 4 minutes per side.
Once flipped, top each patty with a slice of Swiss and a slice of cheddar, allowing the cheese to melt slightly.
Butter one side of each slice of rye bread.
On the non-buttered side of four slices, place a cheese-covered beef patty and top with caramelized onions. If using, spread a touch of Dijon mustard or Thousand Island dressing on the other bread slice.
Close the sandwiches with the remaining rye slices, buttered side out.
Cook each sandwich until golden brown, about 2-3 minutes per side, pressing down slightly with a spatula to ensure even toasting.
Serve hot and enjoy the trip back to the Golden Era!
Special Warning: Ensure that the beef patties are cooked to a safe temperature (at least 160°F or 71°C for ground beef) to avoid the risk associated with consuming undercooked meat.
Quick Caramelized Onions for Patty Melt
Ingredients:
3 large onions, thinly sliced
2 tablespoons unsalted butter
1 teaspoon salt
1/2 teaspoon sugar (optional)
Directions:
Prep: In a large skillet, melt the butter over medium heat.
Add Onions: Introduce the sliced onions and sprinkle with salt.
Cook: Reduce heat to medium-low and cook the onions, stirring occasionally, for about 30-40 minutes or until they turn a deep golden brown. For faster caramelization, sprinkle in the optional sugar about halfway through.
Serve: Once caramelized to your liking, remove from heat and use as desired in the patty melt.
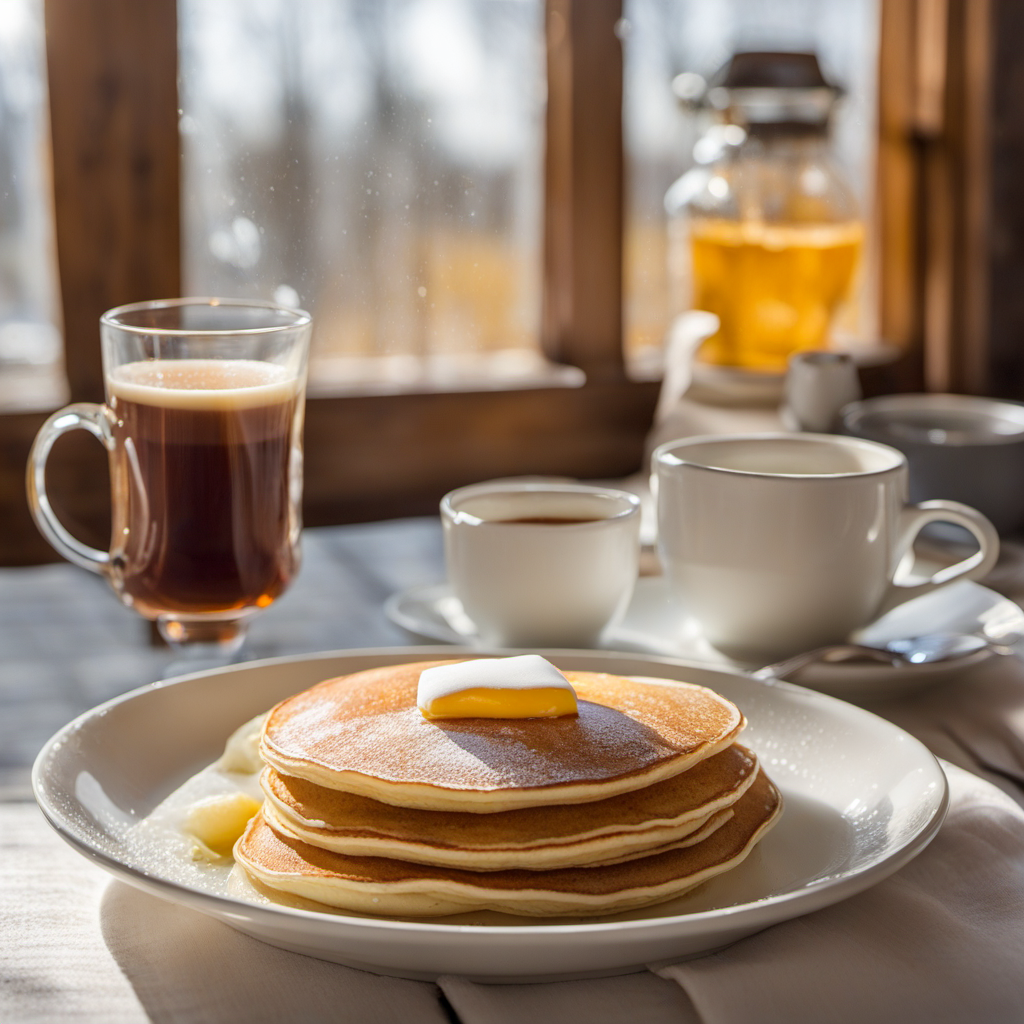
I’ve taken my pancake expertise to new heights, blending history, humor, and tantalizing taste in every delectable bite. So, grab your spatulas and prepare for a syrupy, flipping-good time!
Unraveling the mystery behind the pancake phenomenon, let’s take a flavorful leap through history. From ancient times when the Greeks and Romans savored these golden treats, to the Middle Ages where pancakes danced on European palates, these delightful discs have conquered breakfast tables worldwide. In North America, they became the heartwarming centerpiece of family gatherings, bonding generations over syrupy goodness.
Now, let’s flip to my own pancake escapades—prepare for laughter and a hint of batter mishaps! Picture the catastrophe of pancakes resembling frisbees, soaring through the air with unruly splats. Oh, the horror! But fear not, brave readers! I embarked on a mission to conquer pancake perfection. Armed with mixing bowls and unwavering determination, I overcame pancake obstacles, turning disasters into delicious triumphs.
Behold the secret recipe to Fluffy Maple Delights! Flour, sugar, baking powder, and a dash of salt merge in a blissful union. Add eggs, milk, melted butter, and a hint of vanilla extract for pancake nirvana. With the guidance of trusted family pancake whisperers, we transformed sticky countertops into griddle magic. Laughter fueled our determination, while taste tests fueled our bellies (strictly quality control, of course!).
Bask in the warmth of cherished pancake memories. Picture lazy Sundays, giggles filling the air, as my own family gathered around the breakfast table. We devoured fluffy stacks, drenched in velvety maple syrup, savoring moments of pure pancake bliss. These memories, a recipe of love and nostalgia, inspire me to perfect Fluffy Maple Delights, ensuring every bite carries the legacy of joy.
Hungry souls, embark on your own Fluffy Maple Delights adventure! With history as our guide, pancake mishaps as our fuel, and laughter as our secret ingredient, let the magic unfold in your kitchen. Prepare to ignite taste buds, create memories, and build a pancake legacy that will be whispered through generations. Join me, your pancake pioneer, on this syrupy journey to pancake paradise!
The Ingredients
2 cups all-purpose flour
2 tablespoons granulated sugar
2 teaspoons baking powder
1/2 teaspoon salt
2 large eggs
1 1/2 cups milk
2 tablespoons melted butter (plus extra for cooking)
Optional: vanilla extract or other flavorings to taste
Maple syrup, for serving
Whipped cream or powdered sugar, for garnish
The Directions
Remember, this recipe is designed to feed 4 hungry souls, so gather your loved ones and let’s dive in!
In a large mixing bowl, whisk together the all-purpose flour, granulated sugar, baking powder, and salt.
In a separate bowl, beat the eggs until they’re nice and frothy. Then, add the milk, melted butter, and any optional flavorings you desire. Whisk everything together until well combined.
Now, it’s time to bring the batter and the griddle together. Preheat a non-stick skillet or griddle over medium heat. Make sure it’s nice and hot, just like your enthusiasm for pancakes.
Grease the skillet with a bit of melted butter, and then ladle about 1/4 cup of the batter onto the hot surface for each pancake. Cook the pancakes until the edges turn golden brown and the bubbles on the surface begin to burst.
Carefully flip each pancake with a spatula, revealing their perfectly golden underside.
Transfer the cooked pancakes to a plate, stacking them high and proud. Ah, the sight of that beautiful pancake tower! Repeat the cooking process with the remaining batter until you’ve transformed it all into stacks of fluffy goodness.
Now, it’s time for the pièce de résistance—drizzle those glorious Fluffy Maple Delights with a generous helping of pure maple syrup. Watch as the golden syrup cascades down the sides, transforming each pancake into a work of art. Add a dollop of whipped cream or a sprinkle of powdered sugar for that final touch of decadence and visual appeal.
Serve the Fluffy Maple Delights with a smile and watch as your loved ones dig in with gusto. Bask in the success of this breakfast masterpiece!
Follow these steps, make those Fluffy Maple Delights shine, and bring joy to your heart and taste buds.
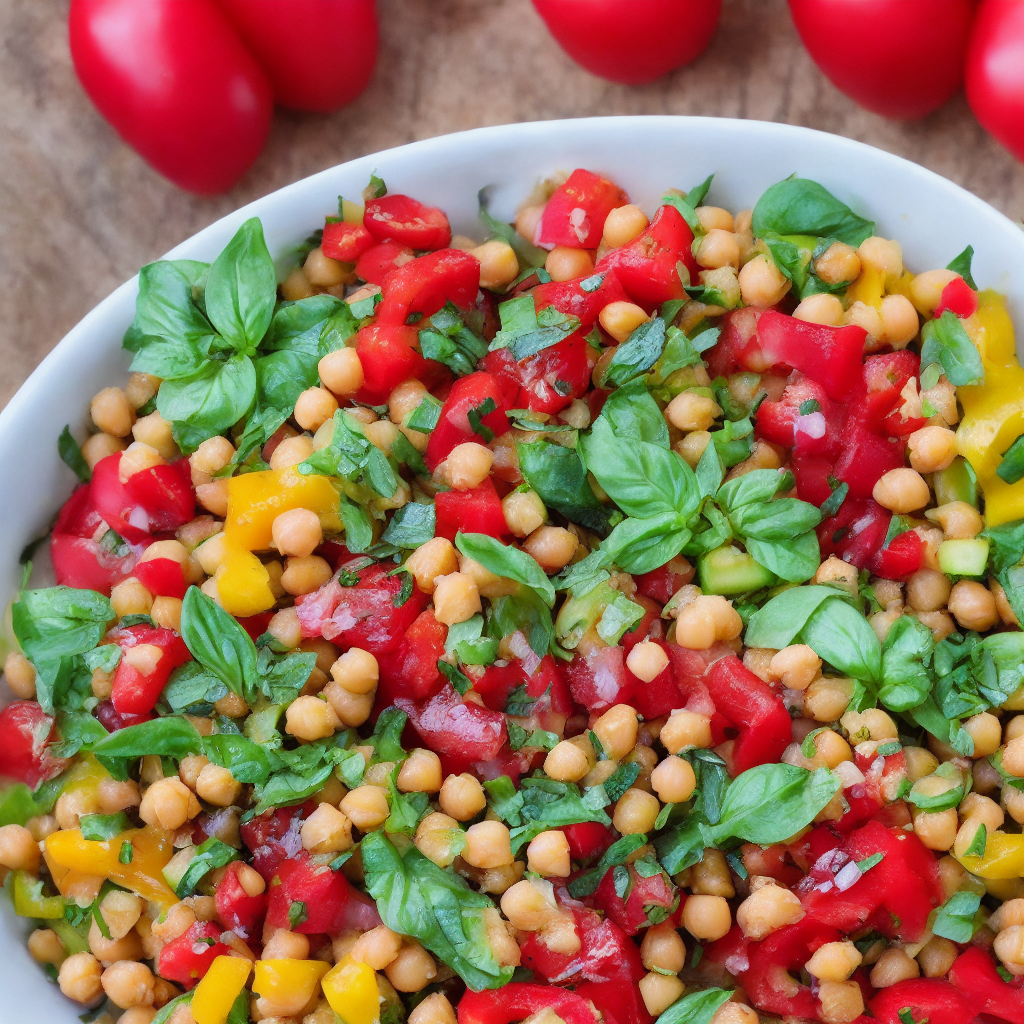
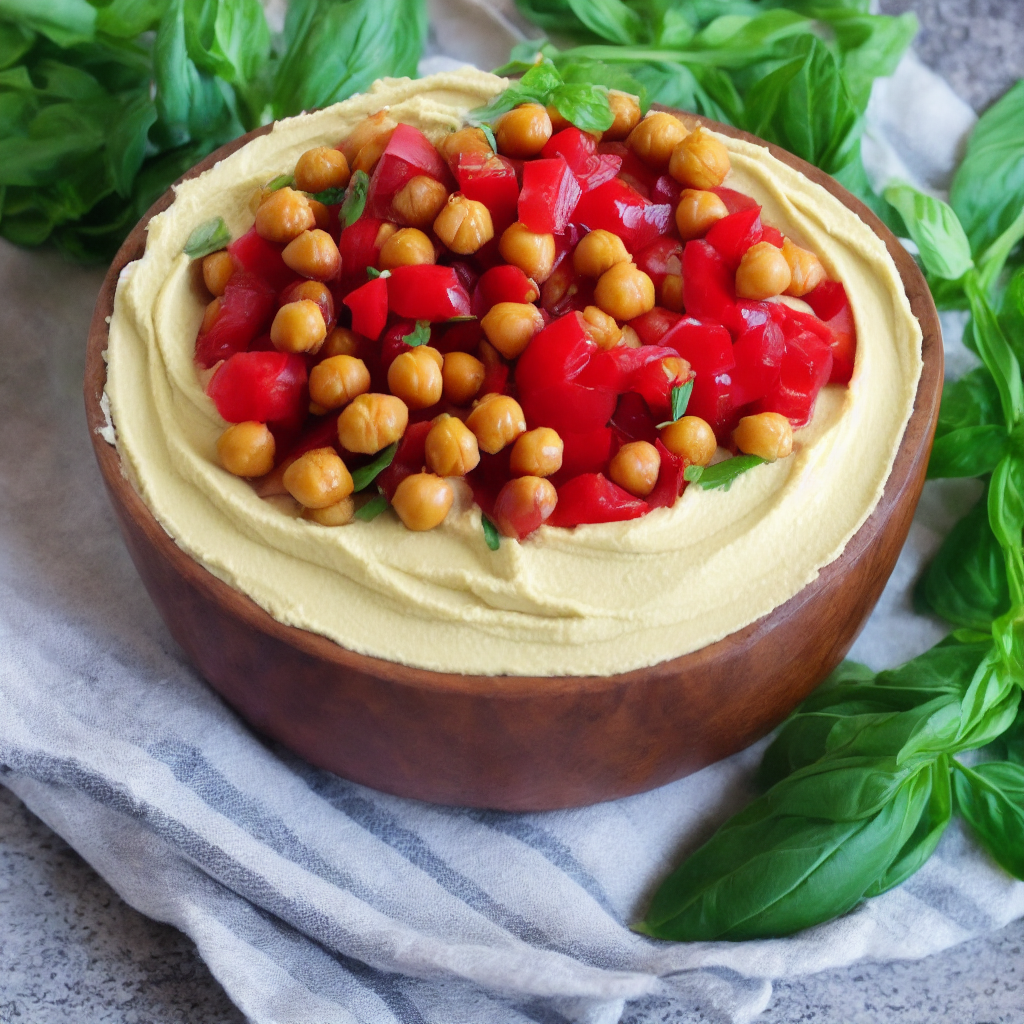
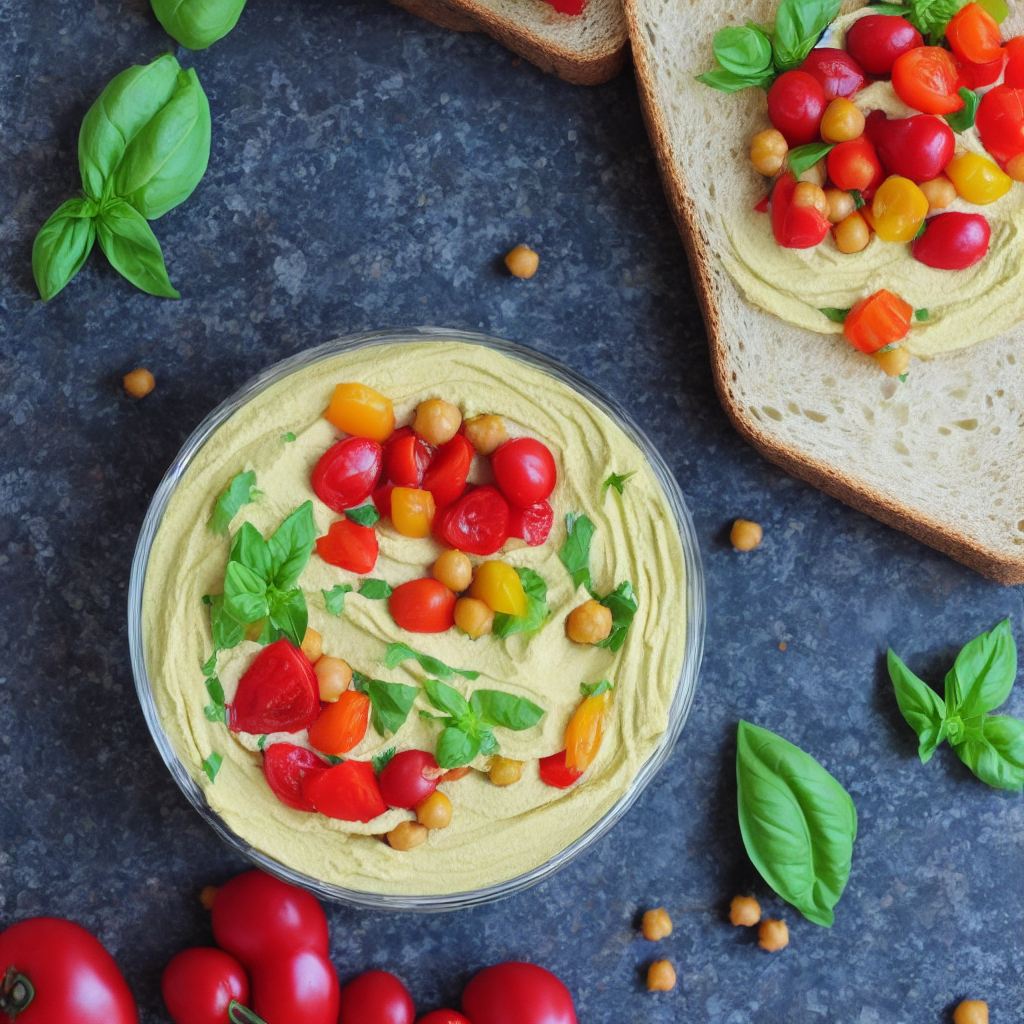
Today, I’m thrilled to share with you a recipe that has captured my heart and taste buds: the Mediterranean Sunshine Chickpea Bliss. Brace yourselves for a journey filled with sun-soaked flavors, tantalizing aromas, and a few hilarious cooking mishaps along the way.
Now, let’s dive into the history of this delectable dish. Picture yourself transported back to the mid-20th century, a time when the world was buzzing with the rise of vegetarian and vegan diets. Seeking alternative options to traditional meat-based sandwiches, culinary pioneers discovered the magic of chickpeas. These versatile legumes were transformed into a glorious mashed filling, reminiscent of beloved classics like tuna and chicken salad.
Working with the ingredients was an adventure in itself. Chickpeas, the stars of the show, were like little balls of sunshine, packed with protein and a delicate nutty flavor. Diced bell peppers and cucumbers brought a refreshing crunch, while cherry tomatoes burst with juicy goodness. The fragrant basil leaves danced in the air, teasing our senses with their aromatic charm.
I must confess, my initial attempts at perfecting this recipe were not without their share of kitchen calamities. Let’s just say there were a few “crunchy” mishaps that left my taste testers questioning my culinary prowess. But fear not! With determination and a pinch of humor, I forged ahead, tweaking the recipe until it reached its true brilliance.
Memories of devouring this dish in the past still bring a smile to my face. The creamy and velvety texture of the mashed chickpeas, the burst of flavors from the tangy lemon zest and savory garlic, and the satisfying crunch of fresh vegetables—all encapsulated the essence of the Mediterranean. It was like a ray of sunshine on my plate, awakening my senses and transporting me to sandy beaches and azure waters.
Now, dear readers, I present to you the ultimate Mediterranean Sunshine Chickpea Bliss. Trust me, it’s a feast fit for a sun-worshiping goddess or a beach-loving mermaid. So gather your ingredients, don your aprons, and embark on a culinary adventure that will tickle your taste buds and leave you yearning for more.
Remember, while this recipe is sure to delight four lucky souls, you can easily adjust the quantities to cater to larger or smaller gatherings. Now go forth, create some kitchen magic, and let the Mediterranean sunshine grace your table with this unforgettable Chickpea Salad Sandwich!
Until next time, keep savoring life, one delicious bite at a time.
Capture the essence of the Mediterranean with our stunning Chickpea Salad creation.
The Ingredients
For the Chickpea Salad:
2 cans (15 ounces each) chickpeas, drained and rinsed
1 large bell pepper, diced
1 large cucumber, diced
1 cup cherry tomatoes, halved
¼ cup fresh basil leaves, finely chopped
Zest of 1 lemon
2 cloves of garlic, minced
3 tablespoons extra-virgin olive oil
Salt and pepper to taste
For Assembling the Sandwich:
8 slices of artisan bread
Optional: Additional fresh basil leaves for garnish
The Directions
Get ready to dazzle your taste buds and feed four hungry folks with this Mediterranean Sunshine Chickpea Bliss. Let’s get cooking!
In a large bowl, combine the drained and rinsed chickpeas, diced bell pepper, diced cucumber, halved cherry tomatoes, finely chopped basil leaves, lemon zest, minced garlic, and extra-virgin olive oil. It’s time for a flavor fiesta!
Season the mixture with salt and pepper to taste. Give it a gentle toss, making sure all the ingredients are well coated in deliciousness. Don’t be shy with the seasoning!
Toast the artisan bread slices to your desired level of crispness. Get those slices toasty and ready for the chickpea goodness!
Now, it’s time to assemble the sandwich magic! Take 4 slices of the toasted artisan bread and evenly distribute the zesty Chickpea Salad mixture on top. Share the love across those bread slices!
Seal the deal by topping each sandwich with the remaining 4 slices of bread. Now you’ve got a complete sandwich symphony of flavors waiting to be devoured!
Optional: For a final touch of pizzazz, garnish with some fresh basil leaves. It’s like putting a fancy bow on a gift!
Ta-da! Your Mediterranean Sunshine Chickpea Bliss is now ready to be enjoyed by you and your three lucky companions. Get ready to dig in and let the flavors transport you to sunny Mediterranean shores!
Remember, this recipe is designed to satisfy four hungry souls. Adjust the quantities accordingly if you’re feeding a smaller or larger group. Now, go forth and create a memorable meal that will leave everyone craving more!
Vibrant flavors that will make your taste buds sing! Meet the Mediterranean Chickpea Bliss.
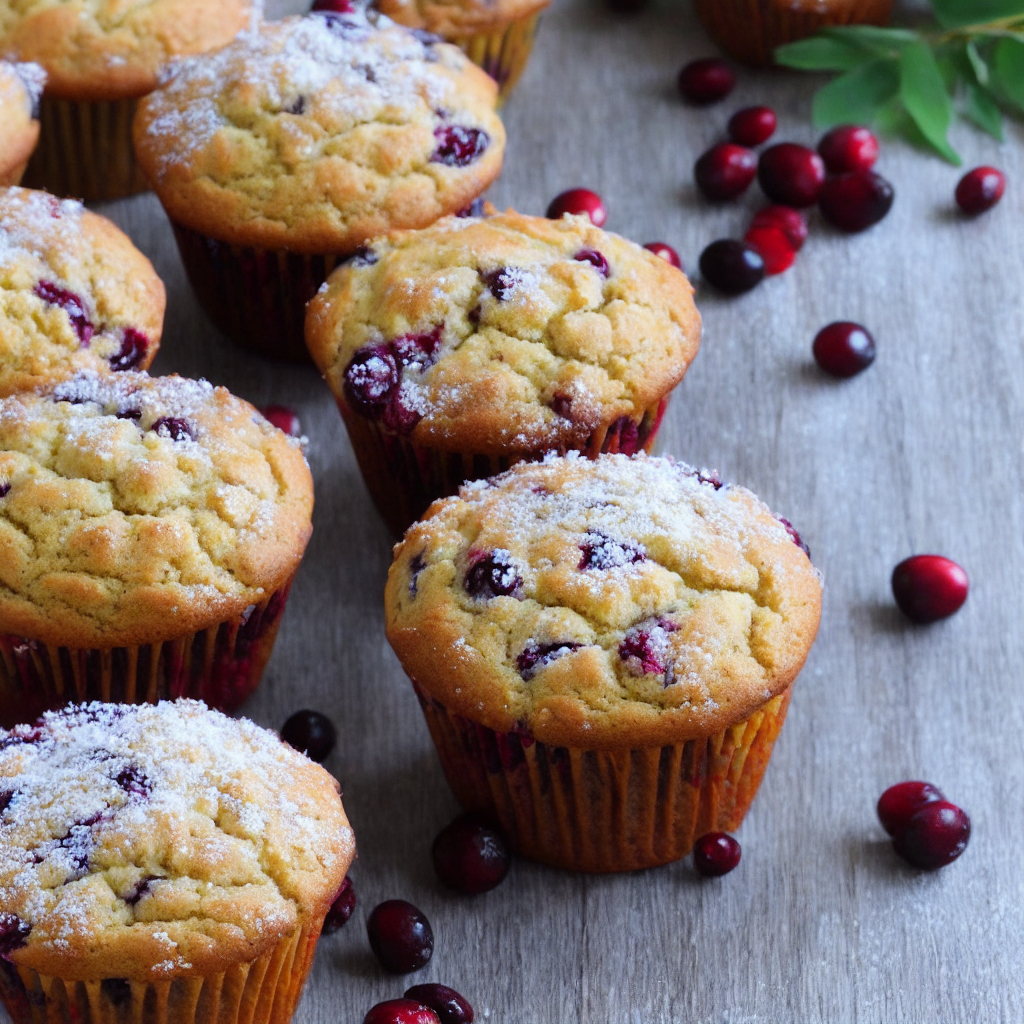
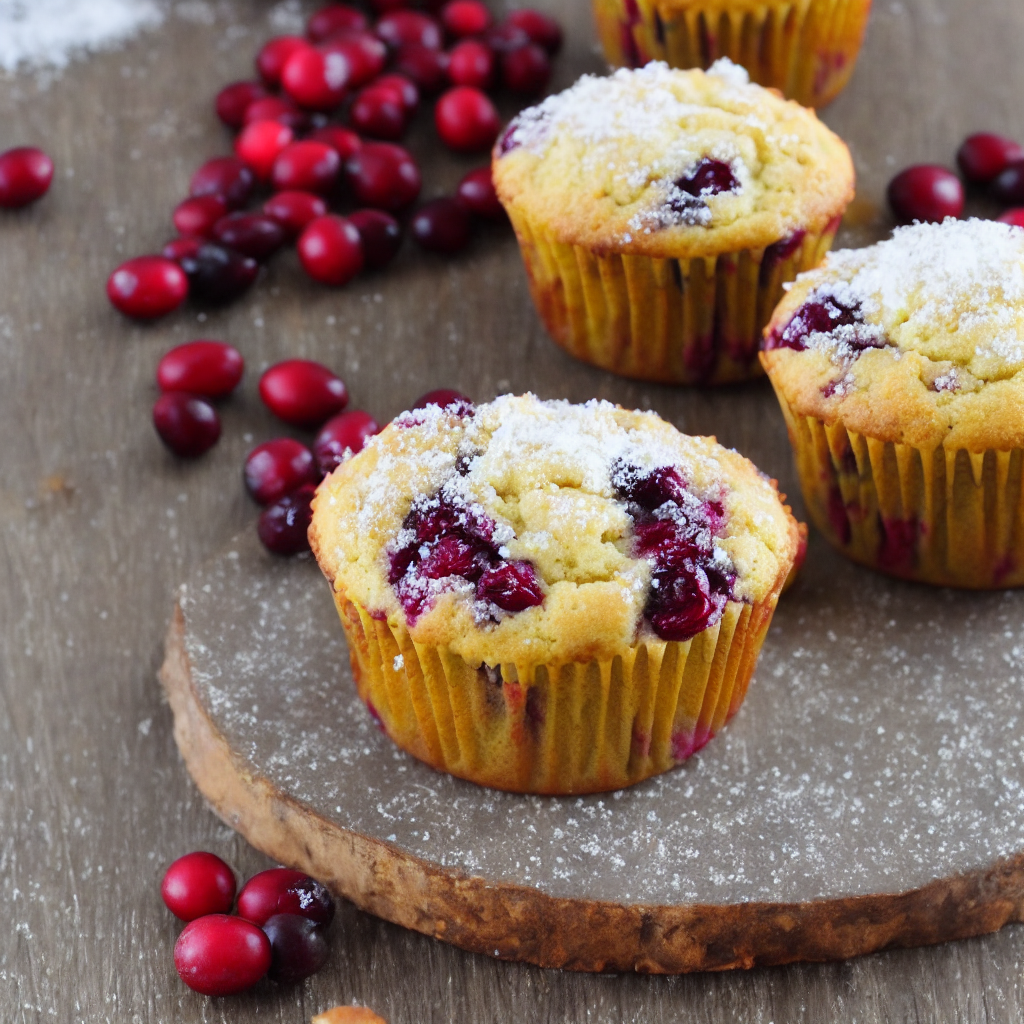
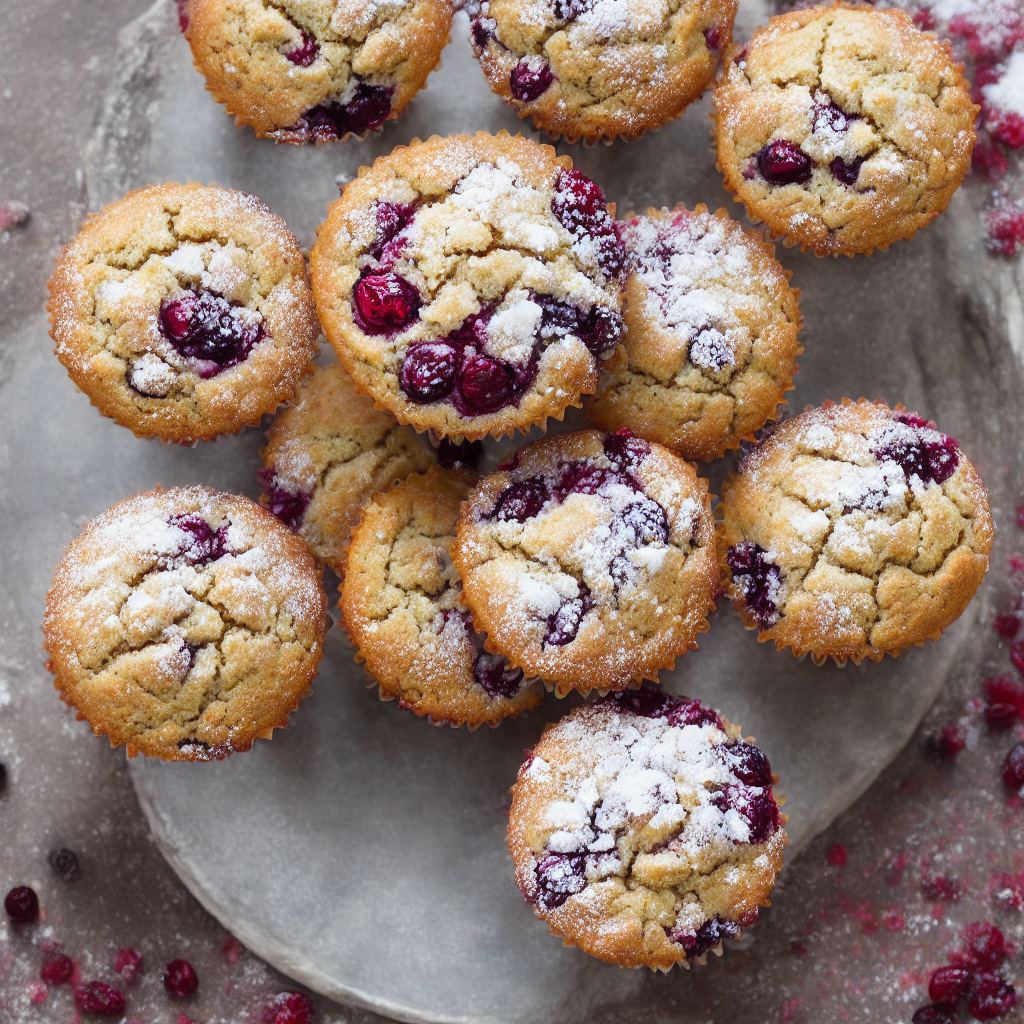
Rise and shine, it’s muffin time! Get ready to taste the sunshine.
Gather ’round as I take you on a journey through time and flavor with my beloved Zesty Sunrise Cranberry Orange Muffins. Trust me, these tangy delights are the breakfast heroes that saved my mornings and satisfied my taste buds in the most unforgettable way!
Now, let’s talk history, shall we? Legend has it that the cranberries and oranges united forces in North America to create a flavor combination that was pure magic. Fast forward to the mid-20th century, when muffin mania took the world by storm. The tartness of cranberries and the zesty essence of oranges joined hands to create the Zesty Sunrise Cranberry Orange Muffins we know and love today.
Ah, my experiences in the kitchen! Picture this: early mornings, a hint of grogginess, and the tantalizing aroma of citrus wafting through the air. My attempts to perfect these muffins were not without their share of mishaps, I tell you. There were batches that turned out as dense as a brick or as dry as the desert. But fear not, dear readers! I persevered and refined the recipe with love, patience, and a dash of culinary experimentation.
One of my biggest challenges was achieving the perfect balance of flavors. Too much tartness from the cranberries, and your face puckers like you’ve bitten into a lemon. Too little zest from the oranges, and the muffins lose their sunny personality. But through trial and error (and a few comical mishaps), I found the ideal harmony that tingles your taste buds just right.
Oh, the memories! The first bite into a freshly baked Zesty Sunrise Cranberry Orange Muffin takes me back to my childhood breakfasts. The tangy cranberries bursting with flavor, the zesty orange dancing on my palate—it’s a symphony of citrusy goodness that instantly transports me to sun-soaked mornings of yesteryear. It’s like savoring a piece of edible nostalgia, folks!
But enough reminiscing, let’s get down to business. These muffins are a breeze to make, with their simple yet exquisite blend of ingredients. Trust me, they’re worth the early morning wake-up call. The moist and tender crumb, the burst of cranberry tartness, and the refreshing zing of orange zest—it’s a breakfast affair you won’t want to miss.
So, fellow food adventurers, whip out your aprons, grab those cranberries and oranges, and let’s embark on a breakfast journey like no other. Together, we’ll conquer the kitchen, one Zesty Sunrise Cranberry Orange Muffin at a time!
Remember, life is too short for bland breakfasts. Rise and shine with these tangy delights, and embrace the zesty goodness that awaits you. Your taste buds will thank you, and your mornings will never be the same again!
Bon appétit, my friends, and may your breakfasts be forever zesty and unforgettable!
Start your day with a burst of sunshine and a muffin in hand.
The Ingredients
2 cups all-purpose flour
1/2 cup granulated sugar
1 tablespoon baking powder
1/2 teaspoon salt
1/2 cup unsalted butter, melted and cooled
2 large eggs
1 cup plain yogurt
1 cup fresh or frozen cranberries
Zest of 1 orange
1/4 cup freshly squeezed orange juice
1 teaspoon vanilla extract
Powdered sugar, for dusting (optional)
Note: The quantities provided are for 4 servings. To adjust the recipe for more or fewer people, you can simply multiply or divide the quantities accordingly. For example, if you want to double the recipe to serve 8 people, you would use 4 cups of flour, 1 cup of sugar, and so on. Similarly, if you only need to serve 2 people, you can halve the quantities.
The Directions
Preheat your oven to 375°F (190°C). Get ready to embark on a zesty adventure that will delight 4 lucky people (or 2 really hungry ones)!
In a large bowl, whisk together the flour, sugar, baking powder, and salt. Take a moment to appreciate the power of these dry ingredients coming together to create the perfect muffin foundation.
In a separate bowl, whisk together the melted butter, eggs, yogurt, orange zest, orange juice, and vanilla extract. Imagine the orange zest infusing the batter with its citrusy magic, while the yogurt adds a touch of creamy goodness.
Pour the wet ingredients into the dry ingredients and gently fold them together. Don’t overmix! We want a lusciously tender crumb, not a tough muffin. Remember, baking is all about finding that perfect balance.
Gently fold in the cranberries, allowing their tartness to mingle with the orange flavors. Each bite will be a burst of fruity joy, so make sure those cranberries are distributed evenly throughout the batter.
Line a muffin tin with paper liners or grease it lightly with butter. Fill each muffin cup about ¾ full with the batter. Picture those perfectly domed muffins rising and basking in the oven’s warmth.
Place the muffin tin in the preheated oven and bake for approximately 18-20 minutes, or until a toothpick inserted into the center of a muffin comes out clean. Use this time to imagine the aroma of zesty goodness filling your kitchen, making it the envy of the neighborhood.
Once baked to a golden-brown perfection, remove the muffins from the oven and let them cool in the pan for a few minutes. Patience is a virtue, but we understand that warm muffins are irresistible, so proceed with caution.
Transfer the muffins to a wire rack to cool completely. Admire their beauty as they cool down, and resist the temptation to snatch one before they’re ready. Remember, patience is key!
Optional: Before serving, sprinkle a touch of powdered sugar on top of the muffins for a delicate finishing touch. This is your opportunity to add a touch of elegance and sweetness to these zesty treats.
Finally, gather your friends and loved ones (or just keep them all to yourself—we won’t judge) and enjoy these Zesty Sunrise Cranberry Orange Muffins together. Revel in the flavors, textures, and aromas that bring a little slice of citrusy joy to your day.
Remember, cooking is an adventure meant to be savored, and these muffins are a delicious reward for your culinary skills. Bon appétit, and may your taste buds dance with delight!
These muffins have the power to turn even non-morning people into breakfast enthusiasts.
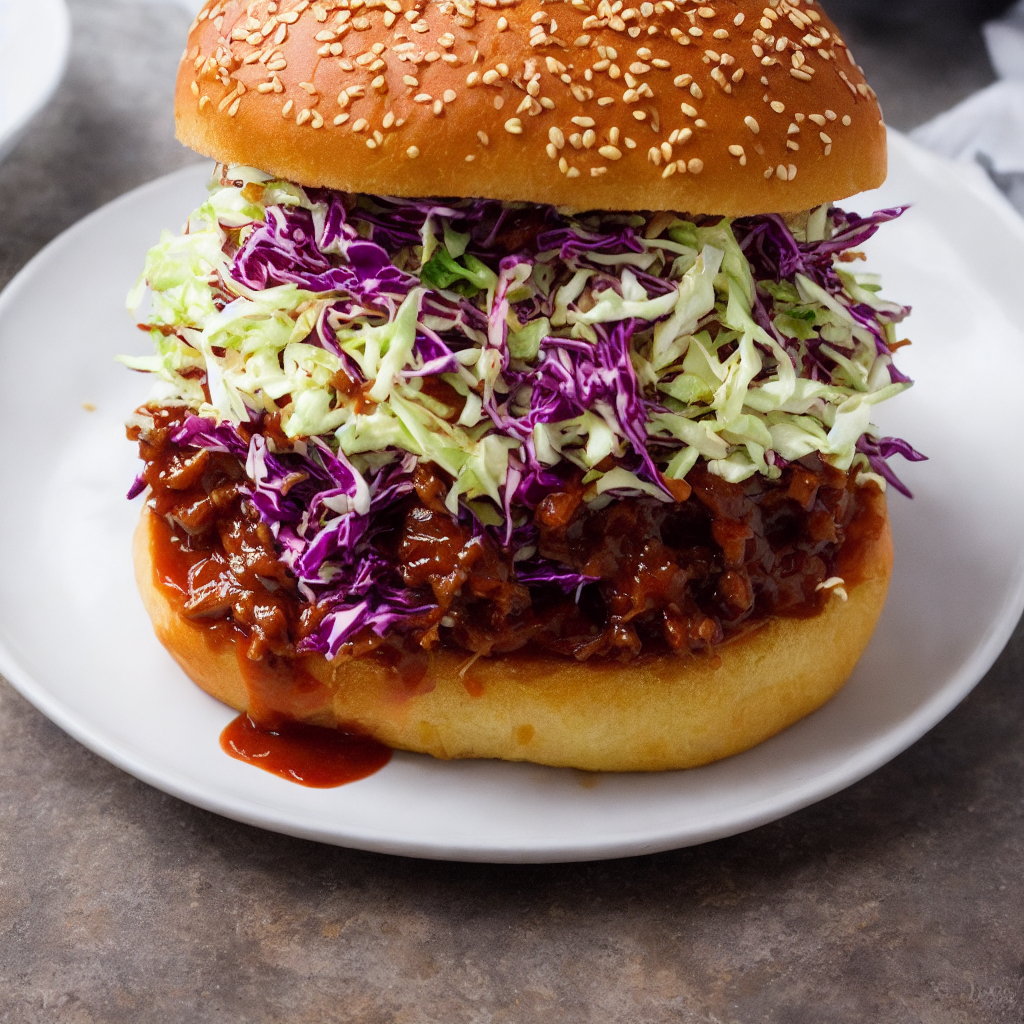
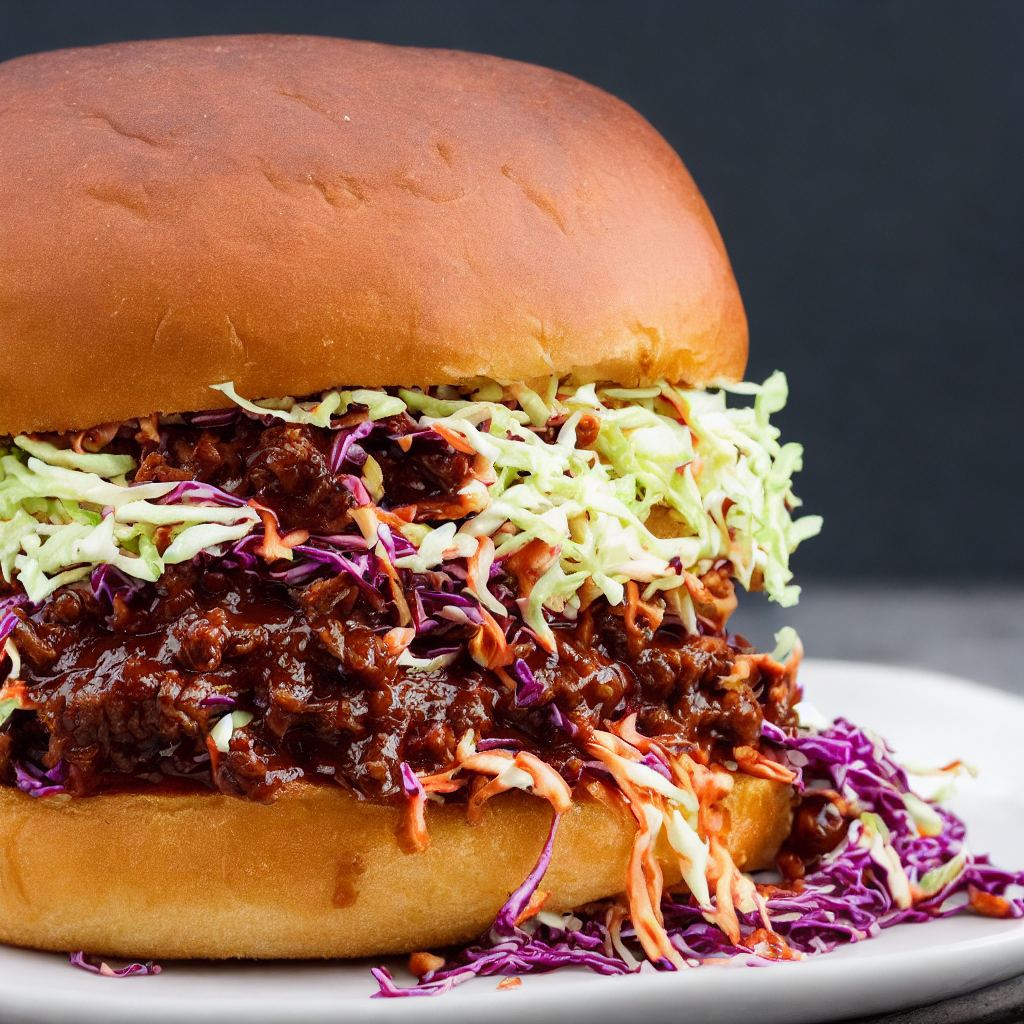
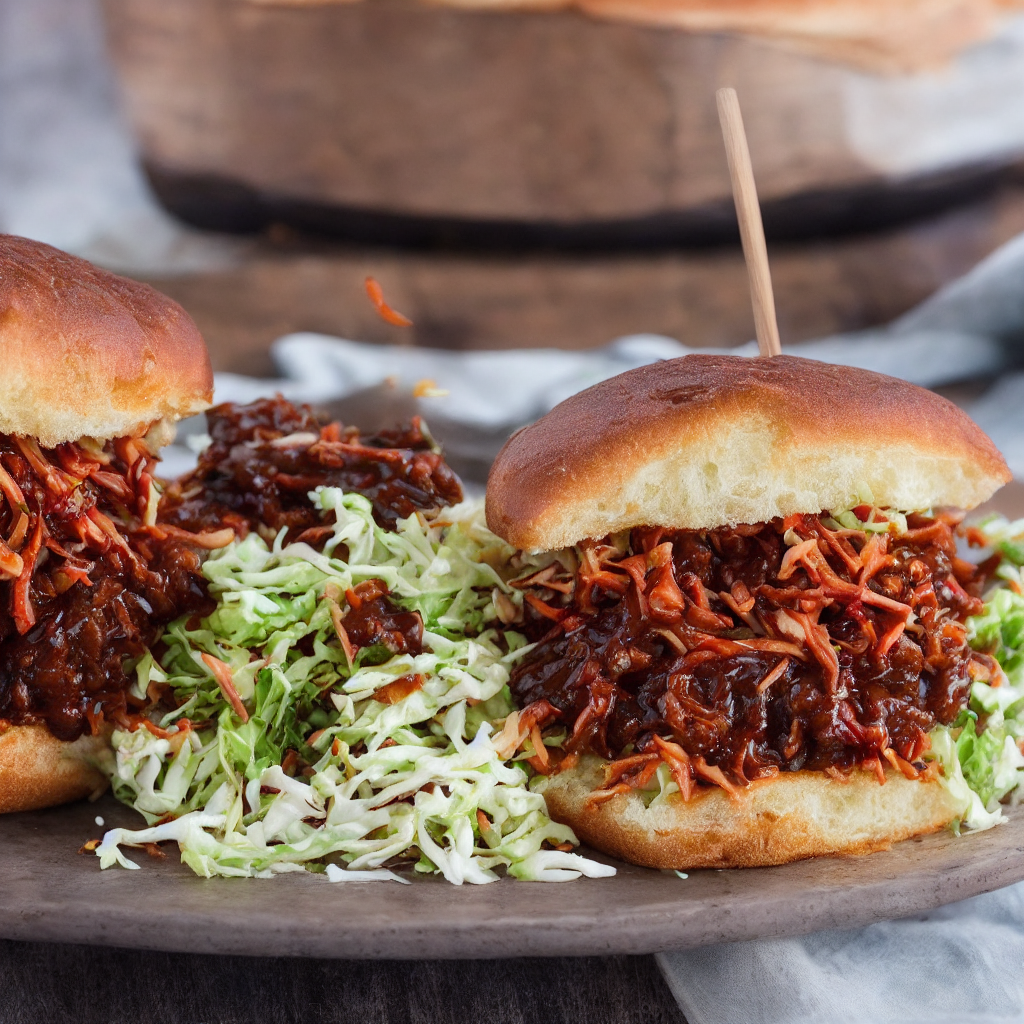
Taste the art of slow-cooked perfection in our tender, saucy Pulled Pork Sandwiches.
Today, I’m thrilled to share my smoky, lip-smacking recipe for Southern Smoked Bourbon BBQ Pulled Pork Sandwiches. Gather ’round as I take you on a journey through time, flavors, and a few culinary mishaps that eventually led me to this finger-licking masterpiece.
Now, let’s delve into the captivating history of this beloved dish. Picture this: It’s the heart of the South, where communities gather, laughter fills the air, and the tantalizing aroma of slow-cooked meats wafts from backyard grills. This is where the BBQ Pulled Pork Sandwich found its roots. Inspired by the pitmasters of yore, who meticulously tended to their smoky domains, this dish became a staple at family reunions and lively get-togethers.
Ah, memories… I recall my early attempts at perfecting this classic sandwich. The first time, let’s just say I was as lost as a chicken in a cornfield. The meat was tough, the flavors were lackluster, and the bun was as dry as the Sahara. But fear not, my culinary comrades, for failure is just the stepping stone to success!
Through experimentation, research, and perhaps a few secret family tips, I discovered the keys to achieving barbecue greatness. Slow-smoking the pork shoulder, with its marbling of succulent fat, was the secret ingredient that transformed tough meat into tender shreds of pure bliss. The marriage of flavors between the smoky spice rub and the tangy bourbon-infused barbecue sauce elevated this dish to celestial heights.
Working with these ingredients can be a dance of flavors. The spice rub, a harmonious blend of paprika, salt, pepper, and more, imbued the pork with a tantalizing kick. And oh, the barbecue sauce! The perfect combination of tang, sweetness, and smokiness, with a touch of bourbon to add a little extra flair. It’s the kind of sauce that makes you want to kiss your fingers and shout “Yeehaw!”
Now, let me transport you back in time to a family gathering in the ’50s. The sun shines down, casting a golden glow as the aroma of smoky pork envelops the air. I can almost taste the tender pulled pork, smothered in that luscious sauce, piled high on a soft bun. The first bite takes me to a place where flavors sing in perfect harmony, and every mouthful is a dance of tangy, sweet, and savory bliss. It’s a moment of pure gastronomic ecstasy.
So, my friends, I invite you to embark on this smokin’ journey with me. Fire up those grills, embrace the low and slow cooking method, and let the intoxicating aromas fill your senses. As you savor each bite of these Southern Smoked Bourbon BBQ Pulled Pork Sandwiches, remember the legacy of the pitmasters and the joy of gathering with loved ones to share a meal that’s both timeless and tantalizing.
May your taste buds dance with delight and your bellies be filled with Southern comfort. Until our next culinary escapade, happy grilling and enjoy the smoky goodness of these delectable sandwiches!
Pulled Pork Sandwiches that’ll have you pigging out in the best way.
The Ingredients
3 pounds (1.4 kg) pork shoulder or Boston butt, boneless
1 cup (240 ml) barbecue sauce
1/2 cup (120 ml) bourbon
1 tablespoon (15 ml) vegetable oil
1 tablespoon (15 g) brown sugar
1 tablespoon (15 g) paprika
1 teaspoon (5 g) salt
1 teaspoon (2 g) black pepper
1/2 teaspoon (1 g) garlic powder
1/2 teaspoon (1 g) onion powder
4 soft hamburger buns
Fresh coleslaw, for garnish (optional)
Note: This recipe is designed to serve 4 people. To adjust the quantity for more or fewer servings, you can increase or decrease the amount of pork shoulder accordingly while maintaining the same ratio for the other ingredients. For example, for 2 people, you can use 1.5 pounds (0.7 kg) of pork shoulder and halve the remaining ingredients. For 8 people, you can use 6 pounds (2.8 kg) of pork shoulder and double the other ingredients.
The Directions
Preheat your grill or smoker to 225°F (107°C). The low and slow cooking is the secret to tender pulled pork perfection.
In a small bowl, combine the brown sugar, paprika, salt, black pepper, garlic powder, and onion powder. This flavorful spice rub will give our pork a mouthwatering kick.
Rub the spice mixture all over the pork shoulder, ensuring it’s evenly coated. Let the seasoned pork sit for about 15 minutes to let those flavors mingle.
While the spices work their magic, it’s time to prepare the grill. If using a charcoal grill or smoker, arrange the charcoal for indirect heat by placing the hot coals on one side and leaving the other side empty. If using a gas grill, heat one side on medium-high for direct heat and leave the other side off for indirect heat.
Place the pork shoulder on the grill over indirect heat, close the lid, and let it smoke away for 4 to 5 hours. Remember, patience is key here. The pork is done when it reaches an internal temperature of 195°F (90°C) and is tender enough to be easily shredded with a fork.
Once the pork reaches its smoky glory, remove it from the grill and let it rest for about 15 minutes. This helps the juices redistribute and makes for a juicier sandwich.
While the pork rests, it’s time to whip up the star of the show: the bourbon-infused barbecue sauce. In a saucepan over medium heat, combine the barbecue sauce and bourbon. Bring the mixture to a gentle simmer, stirring occasionally, and let it cook for about 10 minutes to meld the flavors.
Now, the moment you’ve been waiting for: shredding that succulent pork! Use two forks to pull the pork apart into tantalizing shreds. Be prepared for the aroma to make your mouth water even more.
Pour the prepared bourbon barbecue sauce over the shredded pork and mix it well. The pork should be generously coated with that lip-smacking sauce.
Time to assemble these epic sandwiches! Place a generous portion of the bourbon-infused BBQ pulled pork onto each soft hamburger bun. If you’re feeling fancy, top it off with a helping of fresh coleslaw for a delightful crunch and added freshness.
Serve these BBQ Pulled Pork Sandwiches with a side of nostalgia and prepare for some serious lip-smacking and satisfied bellies.
And finally, enjoy the flavors of the South with each bite!
Get your hands saucy and your taste buds dancing with our Southern BBQ Pulled Pork Sandwiches!
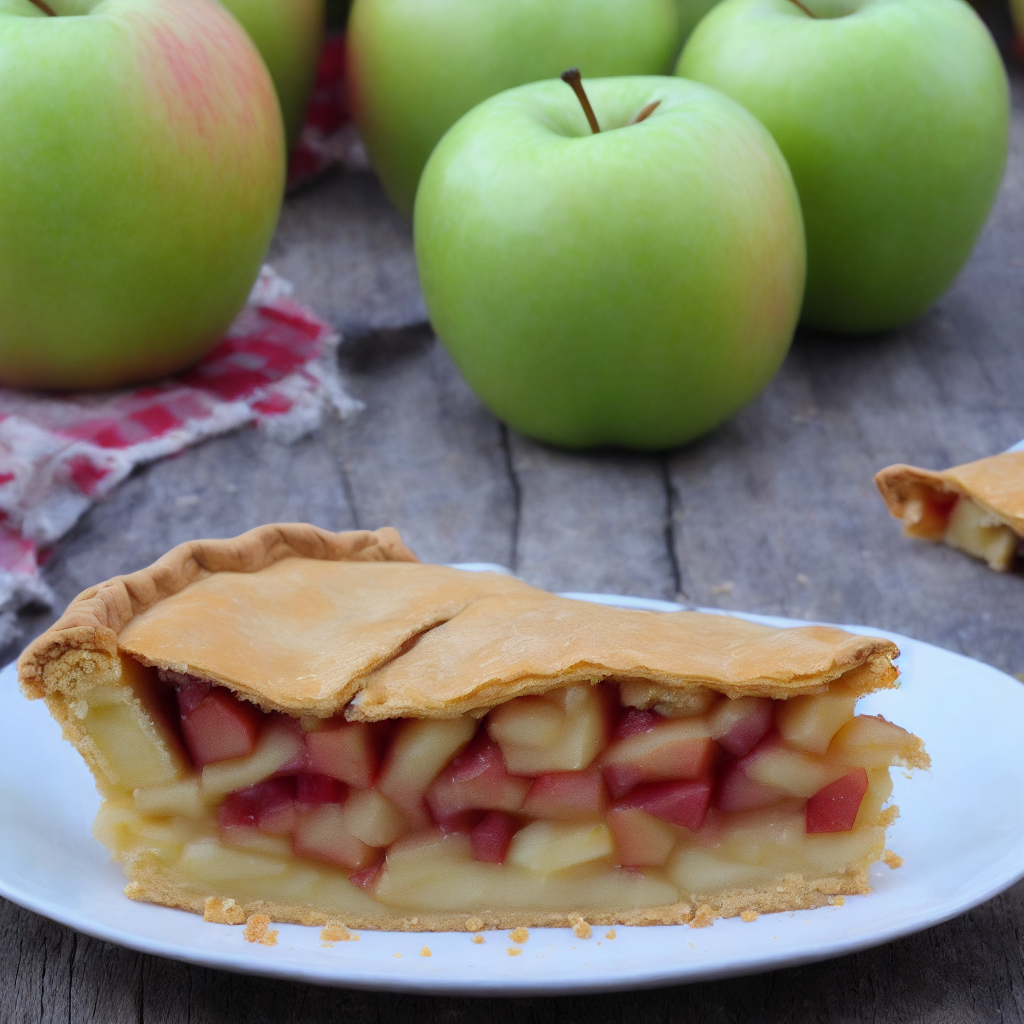
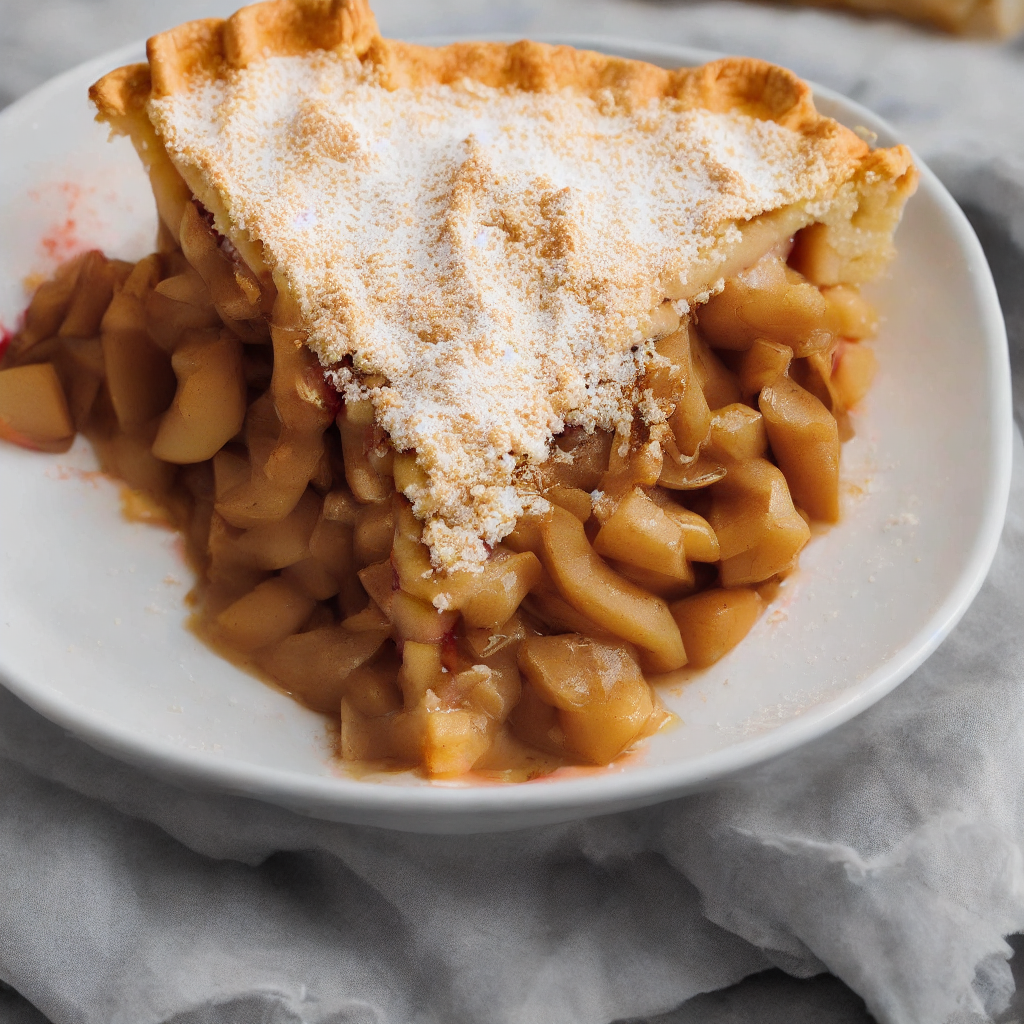
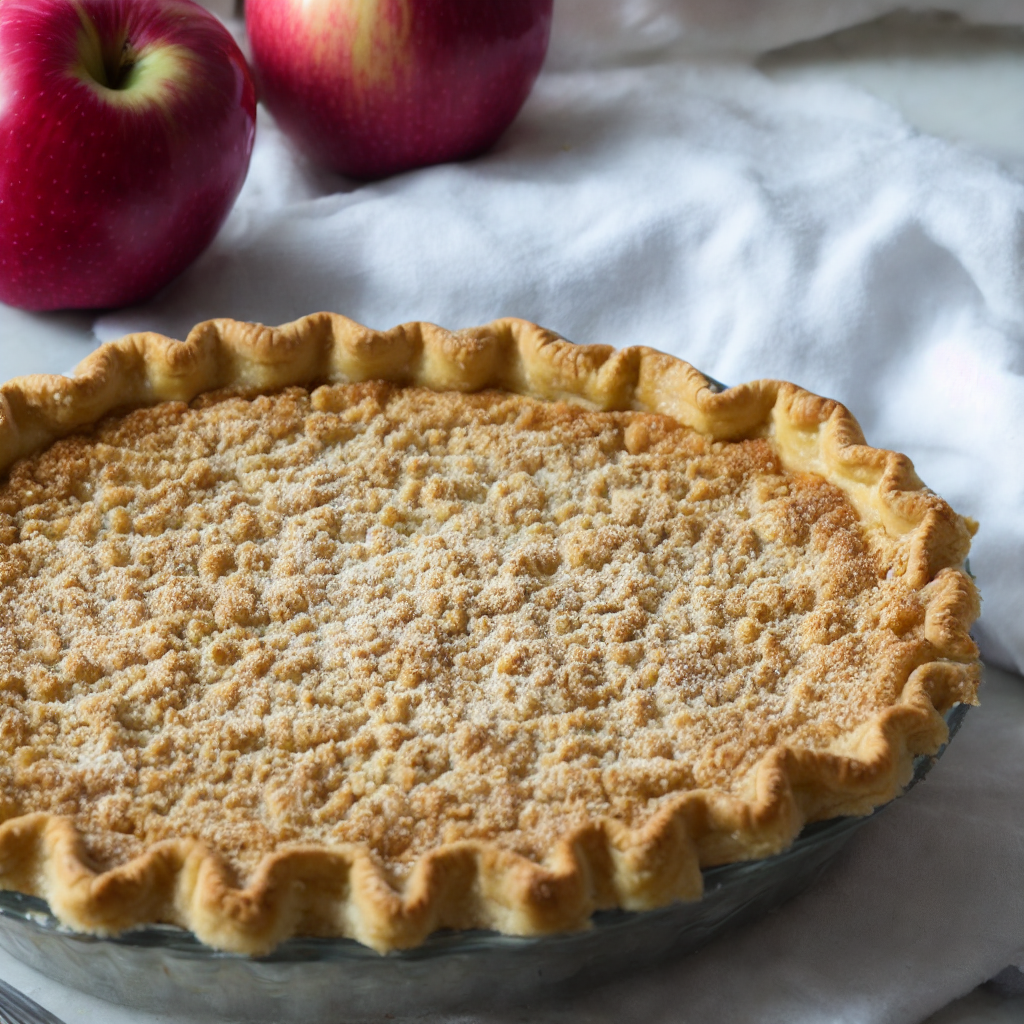
Resistance is fruit-tile: succumb to the temptation of PIE!
Today, I’m thrilled to share with you my all-time favorite apple pie recipe: Harvest Bliss Apple Pie. As an experienced baker and lover of all things pie-related, this recipe holds a special place in my heart. Let me take you on a mouthwatering journey through the history of this delectable dessert and the wild adventures I’ve had while perfecting it.
Did you know that apple pie has been tantalizing taste buds for centuries? Its roots can be traced back to medieval England, where it was first made using a simple mixture of apples, sugar, and spices wrapped in a sturdy pastry crust.
Thanks to the culinary prowess of English settlers, this iconic dessert made its way to the American colonies, becoming a symbol of homey comfort and the American way of life.
When I first embarked on my quest to create the ultimate apple pie, I found myself knee-deep in a flurry of flour and apple slices. I experimented with different varieties of apples, discovering that a combination of tart Granny Smiths and sweet Honeycrisps yielded the perfect balance of flavors. The addition of warming spices like cinnamon and nutmeg added a touch of coziness, taking the pie to a whole new level of deliciousness.
Now, let me confess something: my early attempts at baking apple pie were… let’s just say interesting. I faced my fair share of soggy bottoms and underwhelming fillings. But fear not! I persevered, armed with determination and a rolling pin. I tinkered with crust recipes, adjusting the ratios of butter to flour until achieving a flaky, golden-brown masterpiece. I also learned the importance of precooking the apples slightly to prevent any unwelcome excess moisture. Failure is just a step on the path to perfection, my friends!
Picture this: a cozy autumn evening, the intoxicating scent of cinnamon and apples filling the air. Gathered around the table, my family and I would eagerly await the moment when the Harvest Bliss Apple Pie emerged from the oven. The golden crust, glistening with a sugary glaze, beckoned us to dig in. Each forkful transported us to a world of sweet nostalgia, reminding us of cherished moments spent together.
So, my culinary comrades, I present to you Harvest Bliss Apple Pie – a true labor of love. The crisp, buttery crust cradles a symphony of flavors, the apples tender yet delightfully firm, and the spices dancing on your taste buds. Prepare to be dazzled by the captivating aroma and the pure joy of sharing this slice of heaven with your loved ones.
Now it’s your turn to embrace the joy of baking and indulge in this glorious Harvest Bliss Apple Pie. Your taste buds will thank you, and your friends and family will applaud your culinary prowess. So tie on your apron, grab that rolling pin, and let’s embark on this unforgettable pie-making adventure together!
Remember, my friends, life is short, but pie is eternal. Enjoy every moment, every bite, and savor the simple pleasures that warm our hearts and fill our bellies.
Bon appétit, pie lovers!
Crust so flaky it could start a conspiracy.
The Ingredients
For the Crust:
2 ½ cups all-purpose flour
1 teaspoon salt
1 cup unsalted butter, cold and cubed
6-8 tablespoons ice water
For the Filling:
6 cups apples (tart varieties like Granny Smith or sweet varieties like Honeycrisp), peeled, cored, and thinly sliced
½ cup granulated sugar
¼ cup brown sugar
¼ cup all-purpose flour
1 teaspoon ground cinnamon
½ teaspoon ground nutmeg
1 tablespoon lemon juice
2 tablespoons unsalted butter, cold and cubed
The Directions
Preheat the oven to 375°F (190°C). This recipe is designed to serve 4 hungry pie lovers, but don’t worry, you can easily double it to feed a bigger crowd or halve it for a cozy night in with just two.
In a large mixing bowl, whisk together the all-purpose flour and salt for the crust. Add the cold, cubed butter, and using a pastry cutter or your fingertips, cut the butter into the flour until the mixture resembles coarse crumbs.
Gradually add the ice water, 1 tablespoon at a time, while gently stirring the mixture with a fork. Continue adding water until the dough starts to come together. Be careful not to overmix. You want the dough to be moist enough to hold its shape but not too wet.
Divide the dough in half, forming two discs. Wrap each disc in plastic wrap and refrigerate for at least 30 minutes to allow the dough to chill and become more manageable.
While the dough is chilling, prepare the filling. In a separate bowl, combine the sliced apples, granulated sugar, brown sugar, all-purpose flour, ground cinnamon, ground nutmeg, and lemon juice. Toss the ingredients together until the apples are evenly coated.
Take one disc of dough out of the refrigerator and place it on a lightly floured surface. Roll it out into a circle large enough to fit your pie dish. Carefully transfer the rolled-out dough into the pie dish, gently pressing it into the bottom and sides.
Pour the apple filling into the prepared crust, spreading it out evenly. Dot the top of the filling with the cold, cubed butter, distributing it throughout.
Roll out the second disc of dough into another circle. You can leave it whole to create a traditional double-crust pie, or use cookie cutters to cut out shapes for a decorative lattice or design. Place the rolled-out dough on top of the apple filling.
Trim the excess dough hanging over the edges and crimp the edges to seal the pie. You can get creative with your crimping pattern or simply press the tines of a fork around the edges for a classic look.
Place the pie in the preheated oven and bake for 45-55 minutes, or until the crust is golden brown and the filling is bubbly. Keep an eye on the pie as it bakes, and if the edges start to brown too quickly, cover them with aluminum foil.
Once the pie is done, remove it from the oven and let it cool on a wire rack for at least 1 hour. This will allow the filling to set and the flavors to meld together. The anticipation might be tough, but trust me, it’s worth the wait!
Finally, slice the Harvest Bliss Apple Pie into generous portions for your hungry crew of 4. Serve it warm with a scoop of vanilla ice cream or a dollop of freshly whipped cream. Enjoy the delightful flavors, the comforting textures, and the sweet memories made around the table.
Congratulations, you’ve mastered the art of creating a homemade Harvest Bliss Apple Pie!
Get your slice of happiness: Harvest Bliss Apple Pie!
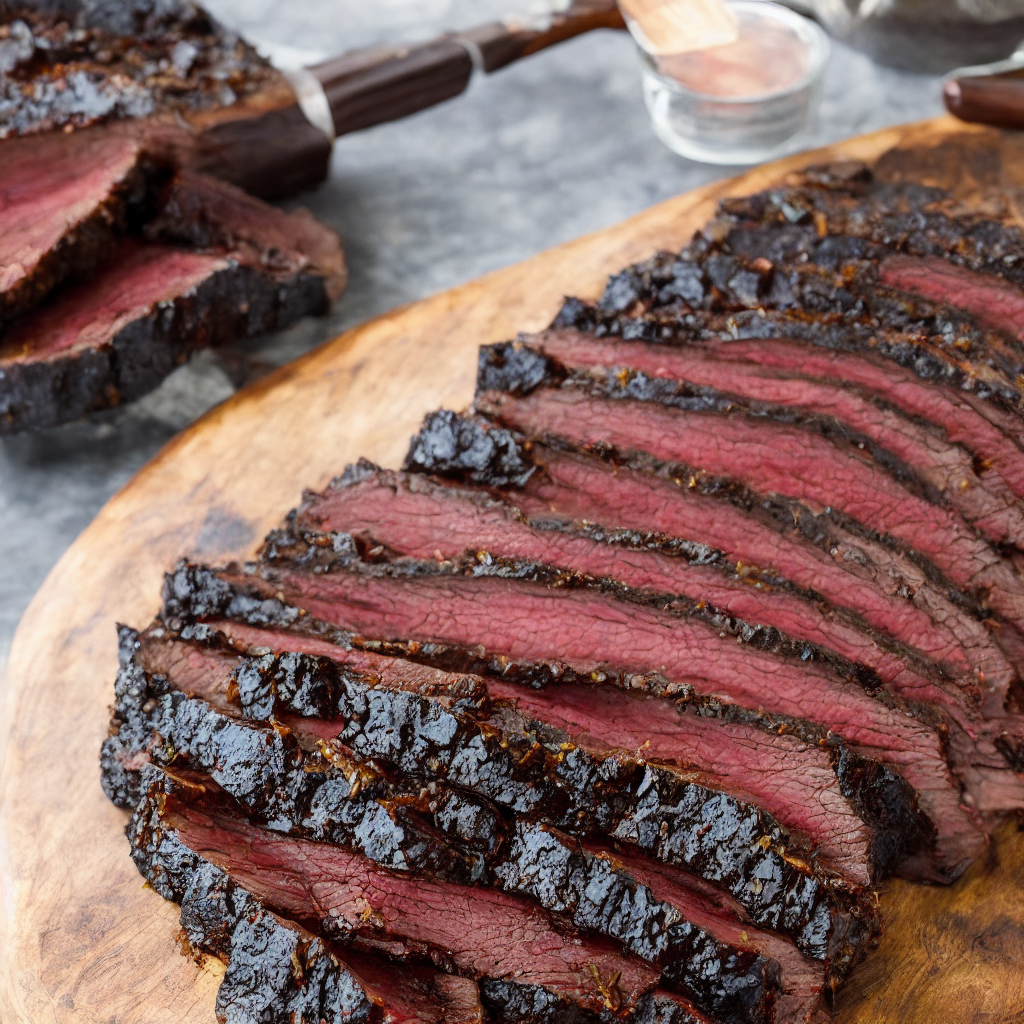
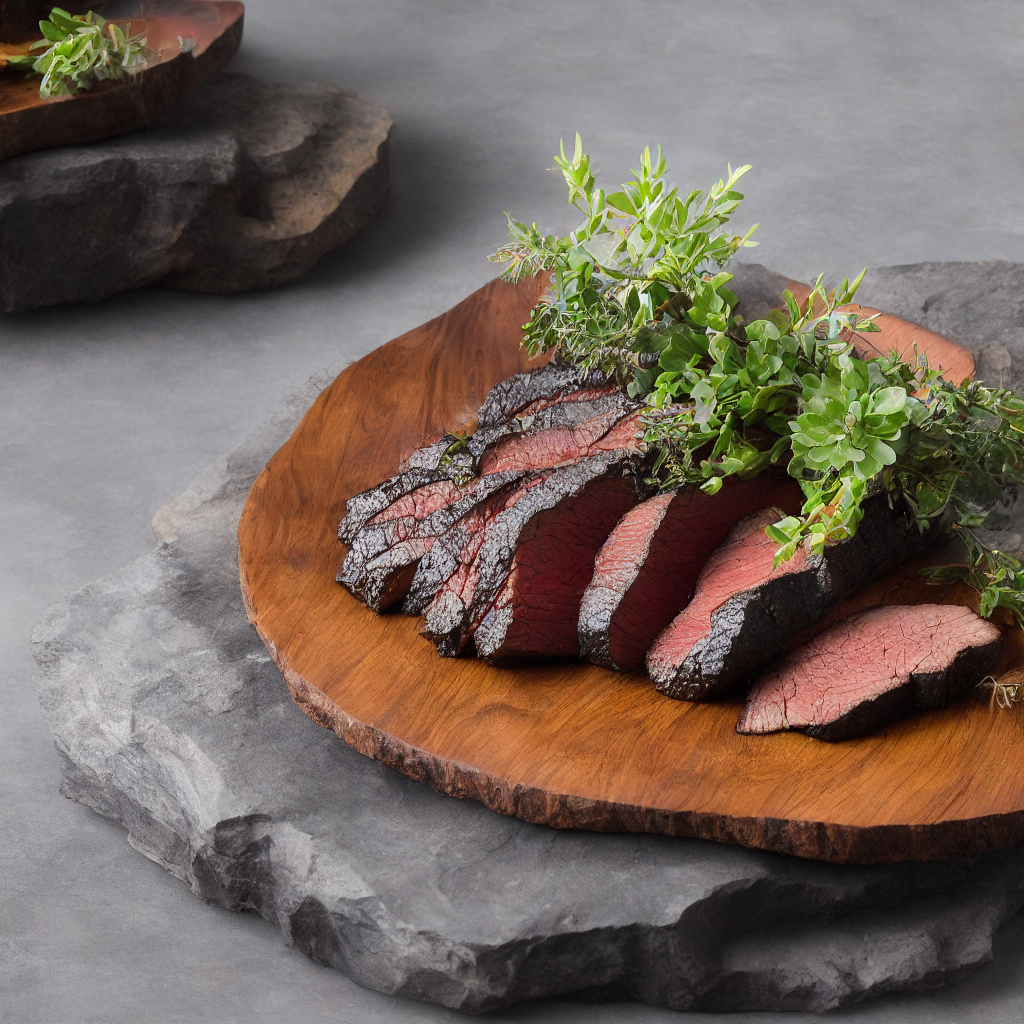
Move over Picasso, this brisket is a masterpiece that belongs in a museum… or my stomach!
Howdy, barbecue aficionados! Gather ’round as I regale you with tales of smoky goodness, tender meat, and a journey that led me to the creation of the mouthwatering Smoky Mesquite Texas Brisket. Picture this: a hazy summer day, the air filled with the tantalizing aroma of sizzling meat on the grill. Ah, the memories!
Now, let’s take a little trip back in time, shall we? Texas-Style Brisket, steeped in the rich traditions of the Lone Star State, traces its origins to the days of cattle drives and ranching. Cowboys, with their trusty smokers in tow, mastered the art of slow-cooking and smoking large cuts of beef to perfection. The result? A tender, smoky delight that would make mouths water for miles around.
But let me tell you, my journey to perfecting this legendary dish wasn’t without its fair share of misadventures. I’ve had my fair share of failed attempts, with briskets as tough as leather and flavors that fell flat. It took countless trials and tribulations, tweaking recipes, and even a few singed eyebrows, to unlock the secrets of a truly outstanding Texas-style brisket.
The secret, my friends, lies in the careful balance of seasoning, smoking technique, and a dash of patience. I’ve worked with the finest mesquite wood, carefully crafting the perfect blend of spices to enhance the natural flavors of the beef. And let me tell you, when that beautifully marbled brisket hits the smoker, the magic unfolds.
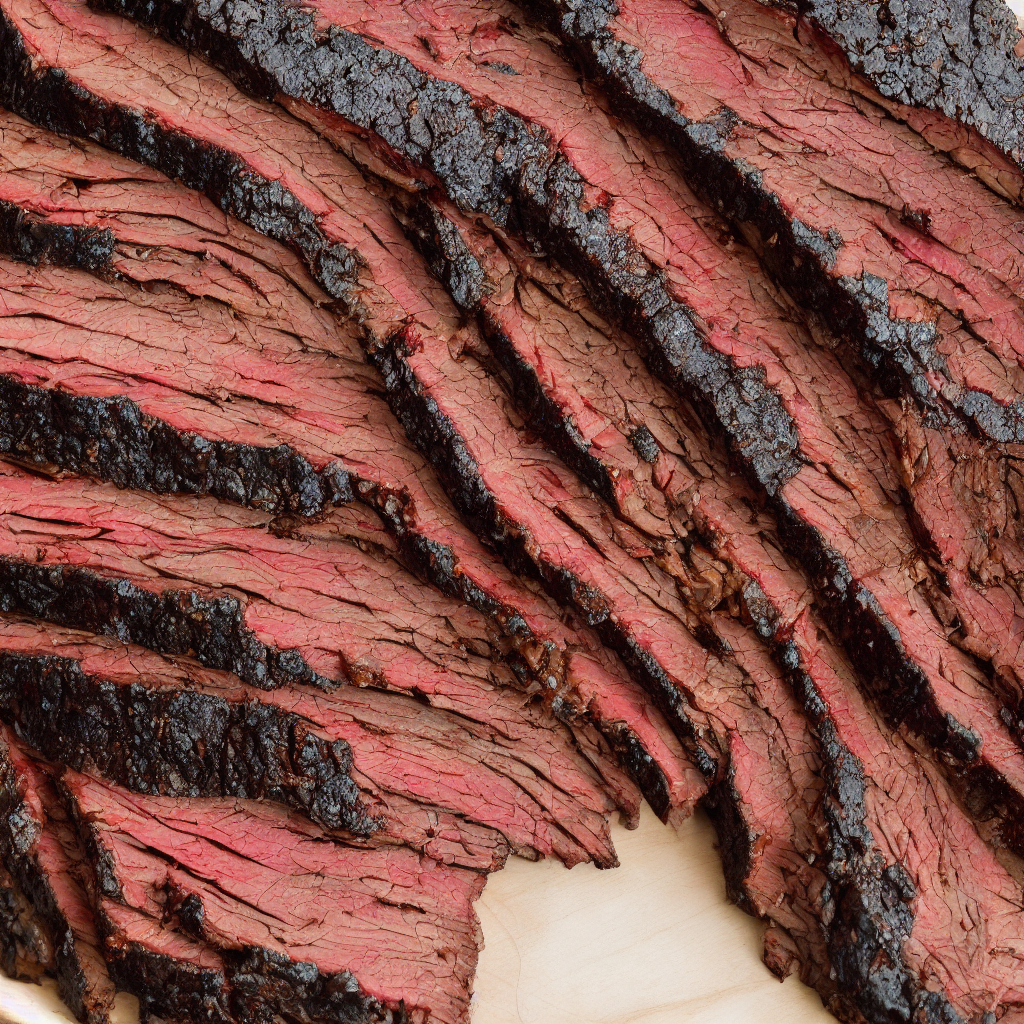
The Smoky Mesquite Texas Brisket emerges with a bark so flavorful and caramelized, you’ll want to frame it. Its mahogany hue and tender slices beckon you closer, promising a symphony of smoky, juicy deliciousness. Each bite is a journey, a harmony of rich beef flavors and the subtle kiss of mesquite smoke. The accompanying tangy barbecue sauce adds a touch of sweetness that will make your taste buds sing.
As I reflect on my experiences with this magnificent dish, I’m reminded of the joy of sharing it with loved ones. I can still hear the laughter, the clinking of glasses, and the satisfied sighs that filled the air as my family and friends gathered around the table, savoring every delectable bite. It’s moments like these that make cooking and sharing food such a beautiful experience.
So, my fellow grill masters and meat enthusiasts, it’s time to unleash the magic of Smoky Mesquite Texas Brisket in your own backyard. Fire up that smoker, embrace the smoky haze, and let the aromas transport you to a place where flavors reign supreme. Trust me, this is a culinary adventure you won’t want to miss!
Remember, my recipe is designed to serve 4 people, but don’t be afraid to adjust the quantities to fit your needs. Whether it’s a cozy family gathering or a backyard shindig, this brisket is sure to steal the show and leave your guests in awe.
Get ready to create memories, embrace the flavors of Texas, and embark on a culinary journey that will have everyone begging for seconds. Smoky Mesquite Texas Brisket awaits you, my friends. Let’s get grilling!
If you listen closely, you can hear the brisket whispering sweet, smoky nothings to your taste buds.
The Ingredients
Ingredients:
3-4 pounds beef brisket with fat cap
2 tablespoons coarse kosher salt
2 tablespoons freshly ground black pepper
1 tablespoon paprika
1 teaspoon garlic powder
1 teaspoon onion powder
Pinch of cayenne pepper (optional)
Mesquite wood chunks or chips
Barbecue sauce (optional)
Note: The quantities listed above are suitable to serve 4 people. To adjust the recipe for more or fewer servings, simply multiply or divide the ingredients accordingly while maintaining the same ratios.
For larger groups:
Double the quantities for 8 people (6-8 pounds brisket).
Triple the quantities for 12 people (9-12 pounds brisket).
Adjust the cooking time accordingly based on the weight of the brisket.
For smaller groups:
Halve the quantities for 2 people (1.5-2 pounds brisket).
Adjust the cooking time accordingly based on the weight of the brisket.
The Directions
Preparing the Brisket:
Preheat your smoker or grill to 225°F (107°C), because this brisket is meant to feed 4 people, not the entire town!
In a bowl, combine the coarse kosher salt, freshly ground black pepper, paprika, garlic powder, onion powder, and a pinch of cayenne pepper (if you like it hot and spicy).
Trim any excess fat from the brisket, but remember, we need that little bit of fat to keep the meat moist during cooking.
Now, generously season all sides of the brisket with the spice mixture, coating it with flavor and love.
Smoking the Brisket:
Time to get smoky! Place the seasoned brisket, fat side up, on the smoker or grill grates.
Close the lid and let the magic happen. Allow the brisket to smoke for approximately 1.5 hours per pound, or until the internal temperature reaches 195-205°F (90-96°C).
While you wait, resist the urge to open the lid unnecessarily. We don’t want to let all that smoky goodness escape!
Resting and Slicing:
Congratulations, you’ve made it this far! Carefully remove the smoky, tantalizing brisket from the smoker or grill and transfer it to a cutting board.
Wrap it loosely with aluminum foil, just like a brisket’s cozy blanket, and let it rest for 30-45 minutes. This allows the juices to redistribute and the meat to become even more tender.
Now, it’s time to slice. Grab a sharp knife and slice the brisket against the grain into thin, juicy pieces. It’s like cutting through butter, but better!
Serving:
Plate up the Smoky Mesquite Texas Brisket and behold its glorious beauty. It’s meant to feed 4 people, but you might be tempted to keep it all for yourself!
For an extra touch, serve it with your favorite tangy barbecue sauce on the side. Let your taste buds dance with delight.
Oh, and don’t forget the sides! Traditional accompaniments like coleslaw, baked beans, or cornbread make this meal even more memorable.
Enjoy the company and the incredible flavors of this Smoky Mesquite Texas Brisket. Remember, it’s meant for 4 people, but if you find yourself with extra hungry guests, adjust the recipe accordingly.
When soft meets juicy. This brisket is a textural masterpiece.
Sink your teeth into this salmon masterpiece and swim in flavor paradise!
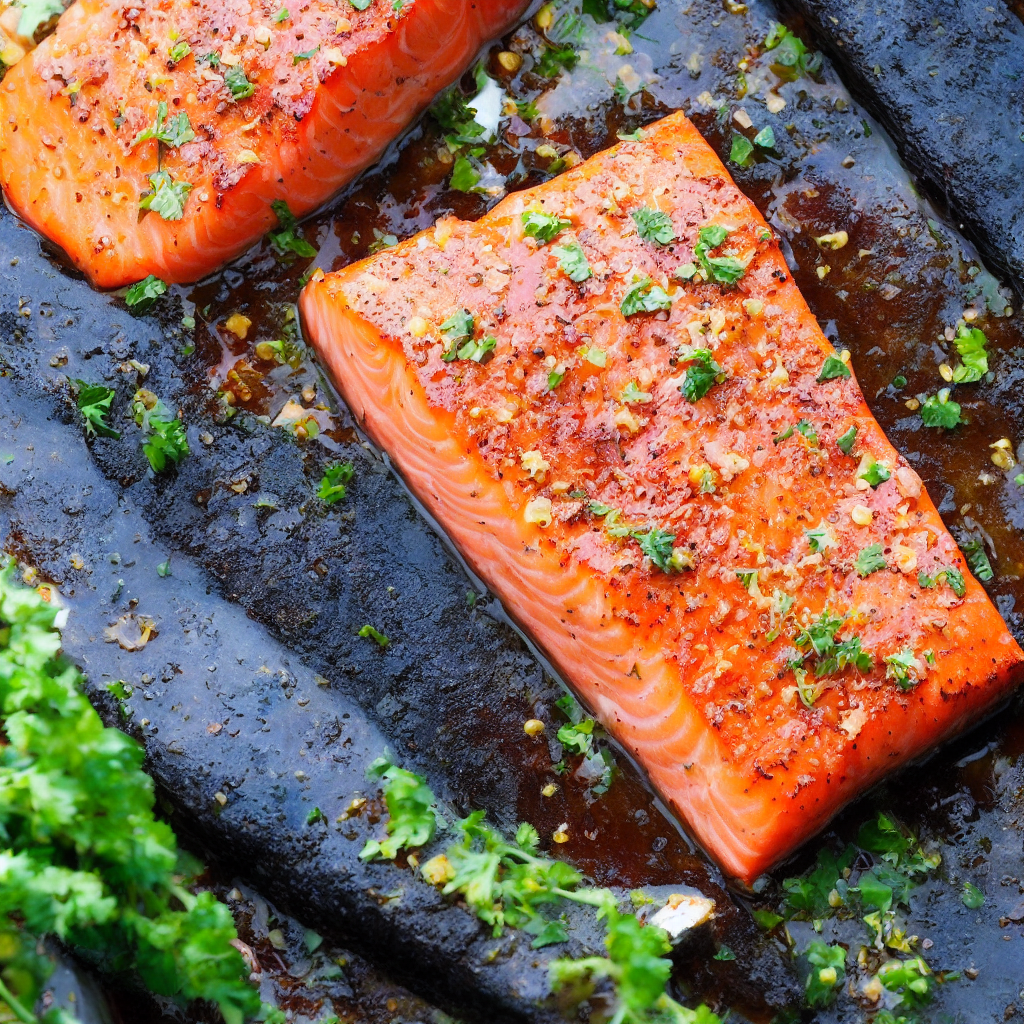
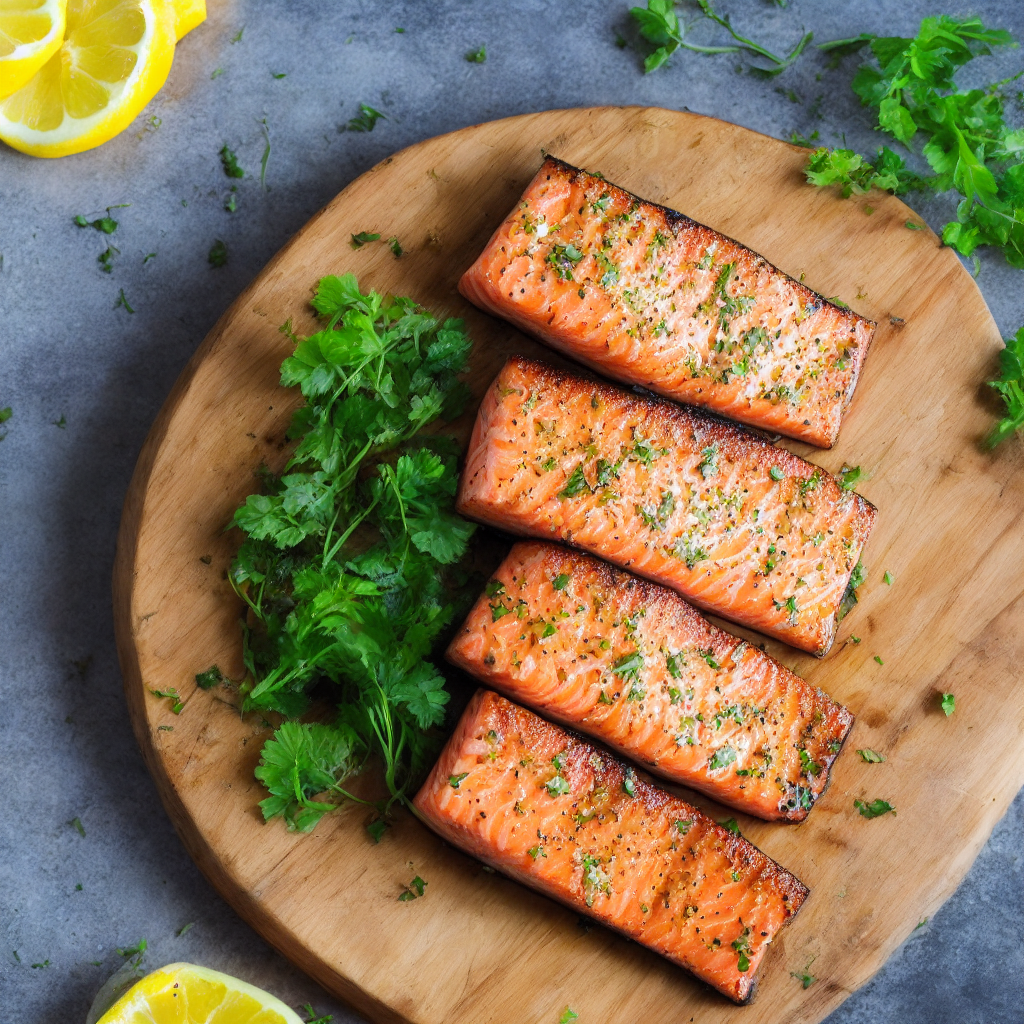
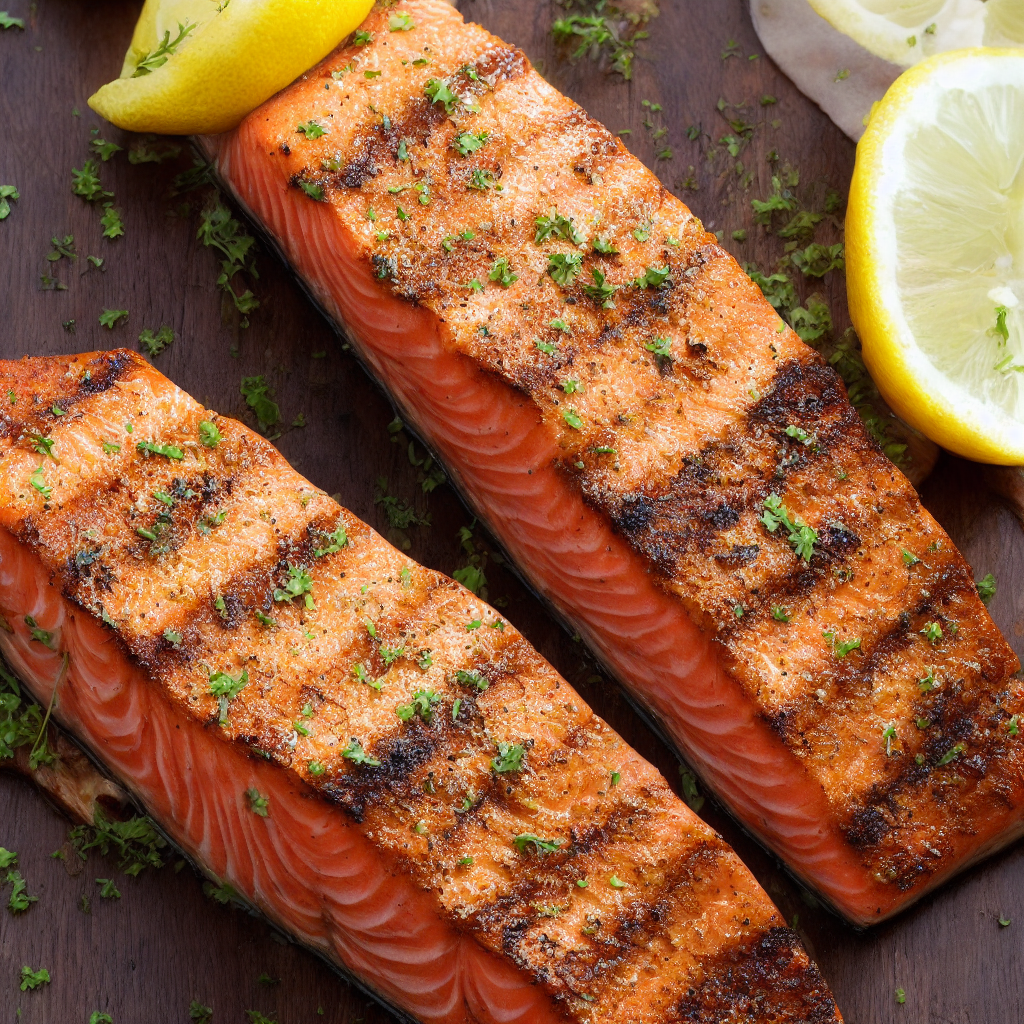
As a self-proclaimed meat lover, I never thought I’d fall in love with a fish dish. But then I tried Lemon Garlic Grilled Salmon, and boy, was I hooked! This dish is the perfect combination of tangy, savory, and buttery flavors, and it’s incredibly easy to make.
The history of grilled salmon goes back thousands of years, with indigenous people in the Pacific Northwest region of North America smoking and grilling the fish over open flames. Today, grilled salmon is enjoyed all over the world, and it’s easy to see why.
Working with the ingredients for this recipe is a breeze. The olive oil, lemon juice, and garlic combine to create a mouth-watering marinade that’s perfect for the rich, buttery salmon. And the lemon wedges and fresh parsley add a pop of color and flavor that’s sure to impress.
But I have to admit, I haven’t always been successful with this dish. I’ve had some failed attempts in the past, with dry, overcooked salmon that lacked flavor. But I didn’t give up, and after some experimentation and tweaks, I finally found the perfect balance of flavors and cooking time.
One of my fondest memories of eating this dish was at a family barbecue. We grilled the salmon on the back patio, and the aroma of garlic and lemon wafted through the air. The salmon was perfectly cooked, with a crispy crust and tender, flaky interior. We served it with a side of grilled vegetables and a cold beer, and it was the perfect summer meal.
So, if you’re looking for a delicious and easy seafood dish that’s sure to impress, give this Lemon Garlic Grilled Salmon recipe a try. Your taste buds will thank you!
Get hooked on the irresistible taste of perfectly grilled salmon!
The Ingredients
4 salmon fillets (about 6 ounces each)
1/4 cup olive oil
2 tablespoons lemon juice
4 cloves garlic, minced
1 teaspoon salt
1/2 teaspoon black pepper
Lemon wedges and fresh parsley, for serving
Note: This recipe makes 4 servings. If you need to feed more or fewer people, you can adjust the quantities accordingly. For example, if you need to serve 8 people, you can double the recipe, and if you only need to serve 2 people, you can halve the recipe.
The Directions
Serves 4 hungry fish lovers!
In a small bowl, whisk together olive oil, lemon juice, minced garlic, salt, and black pepper.
Place the salmon fillets in a shallow dish and pour the marinade over them, making sure they are fully coated. Cover the dish and let the salmon marinate in the fridge for at least 30 minutes.
Preheat your grill to medium-high heat.
Remove the salmon fillets from the marinade and discard any remaining marinade.
Place the salmon fillets on the grill, skin-side down. Grill for 5-6 minutes per side, or until the salmon is cooked through and flakes easily with a fork.
Serve the grilled salmon hot with lemon wedges and fresh parsley.
It’s that simple! This recipe is easy to follow and sure to impress. The tangy lemon and savory garlic flavors are the perfect complement to the rich, buttery salmon, and the fresh herbs and lemon wedges add a pop of color and flavor. So go ahead and try out this delicious Lemon Garlic Grilled Salmon recipe for your next BBQ, family dinner, or romantic night in.
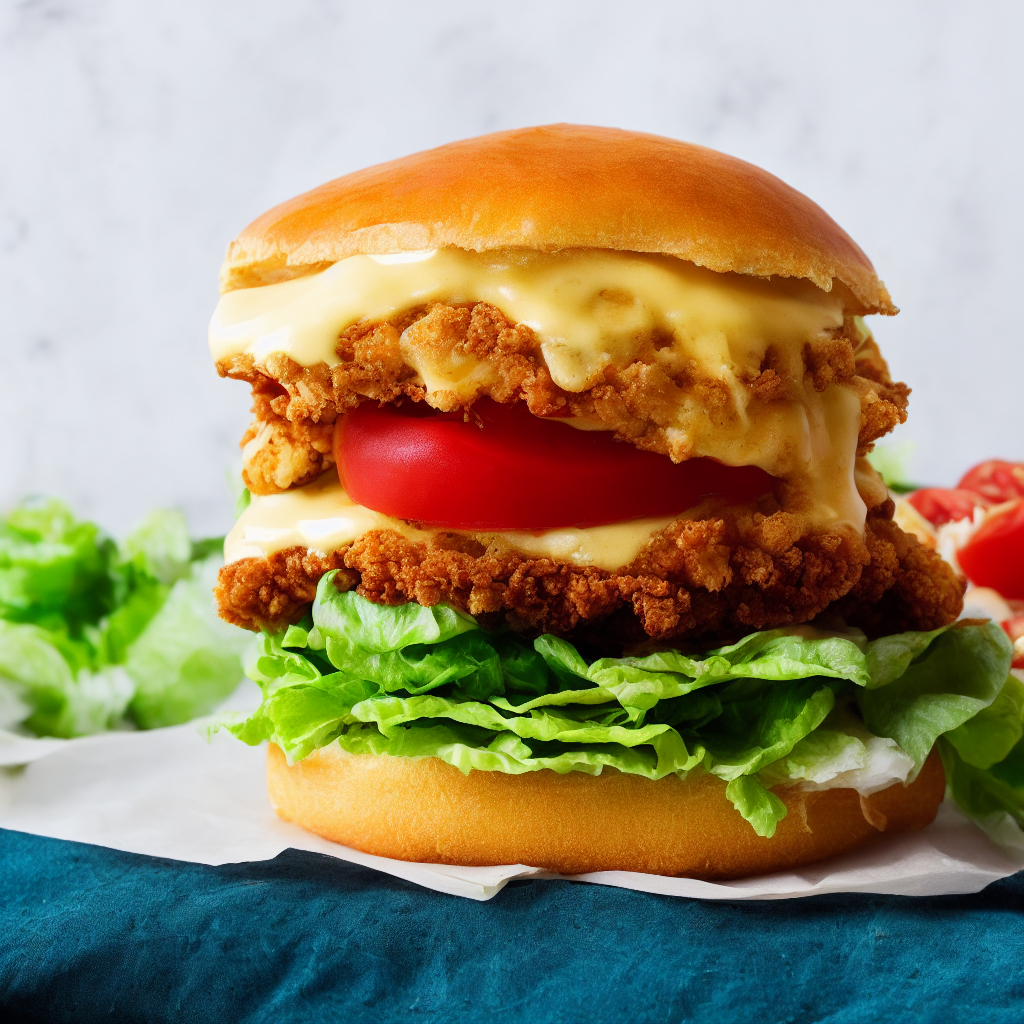
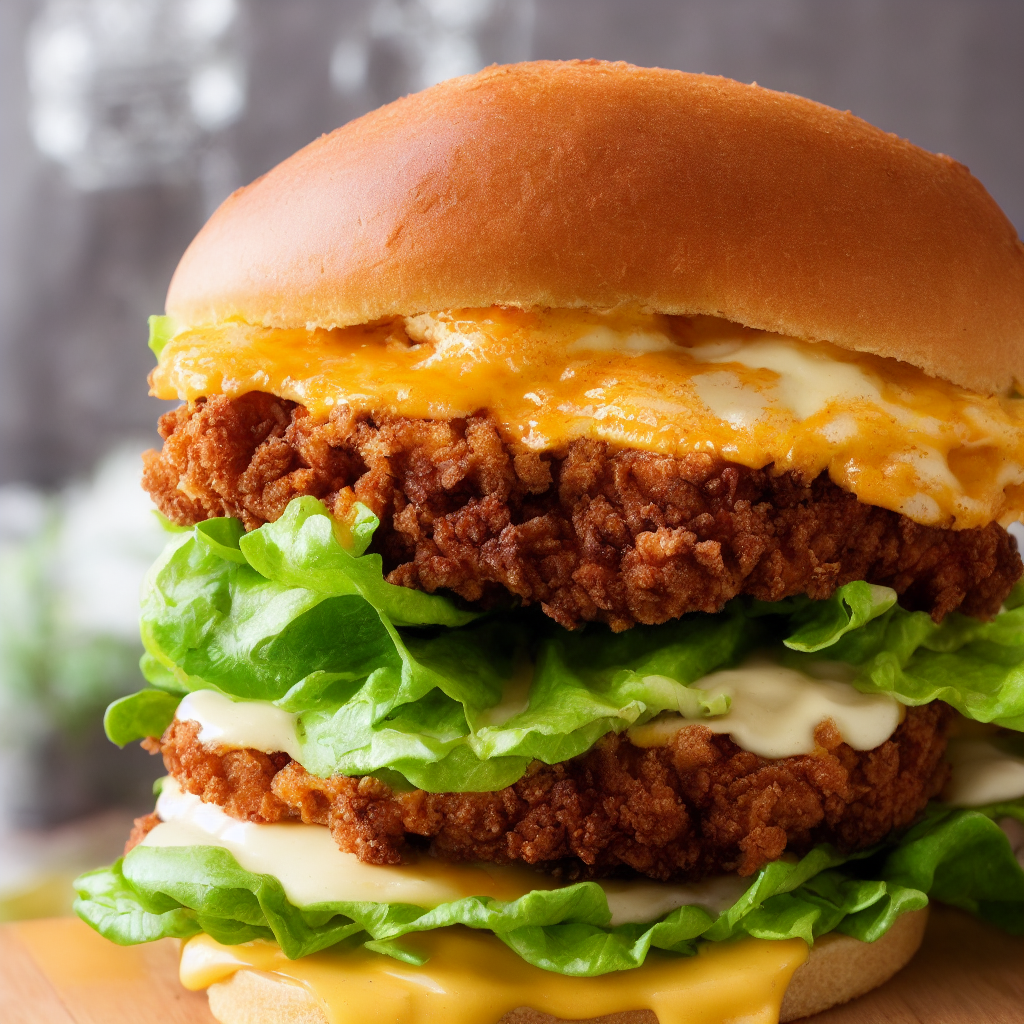
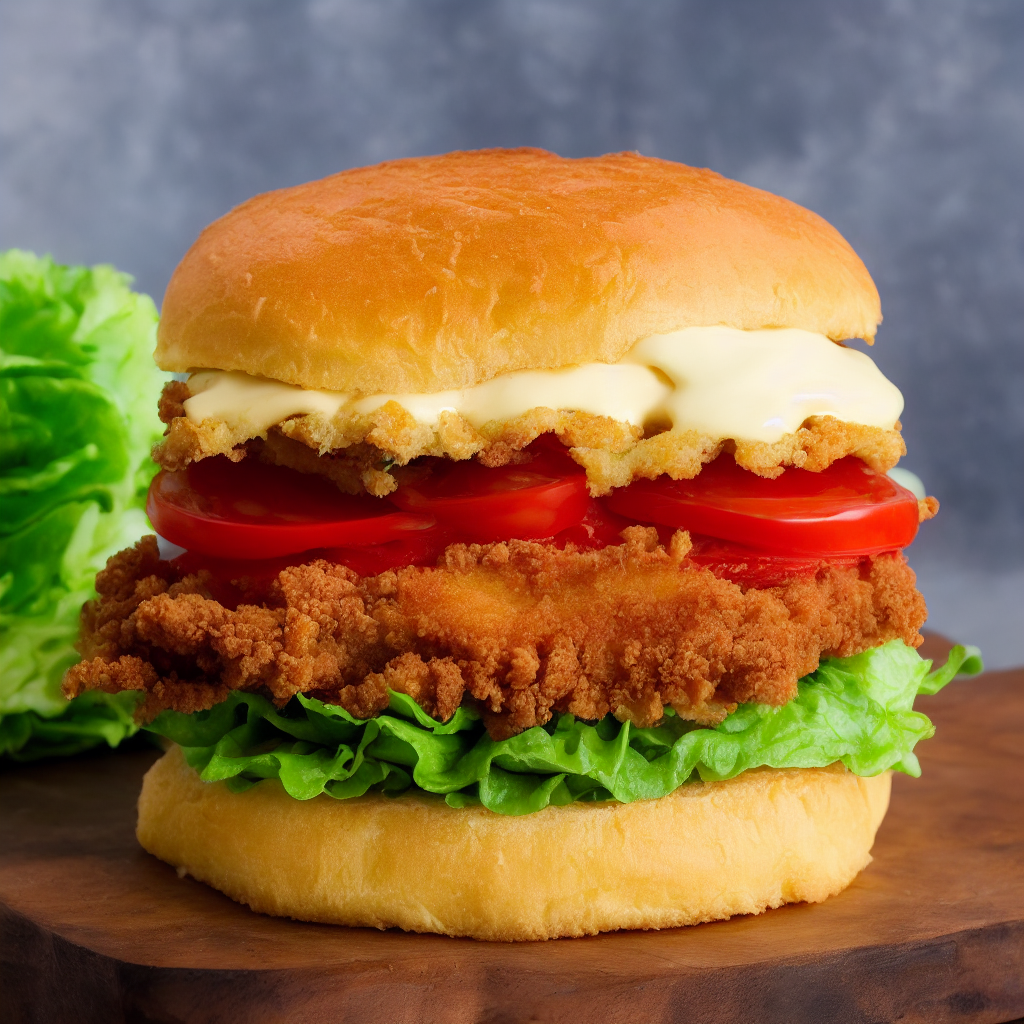
Hey y’all! I’m here to share with you one of my favorite recipes: the Southern Comfort Fried Chicken Sandwich. This sandwich is a twist on a classic dish that’s perfect for feeding a hungry family or impressing your guests at a weekend BBQ.
Now, before we get into the recipe, let’s talk a little bit about the history of this dish. Fried chicken has been a popular dish in the South for centuries, but it wasn’t until the 1930s when a restaurant in Lubbock, Texas served a fried chicken sandwich that this dish really took off. Since then, it’s become a staple of fast food menus across the country. But, let me tell you, this homemade version beats any fast food chain’s sandwich hands down.
When it comes to cooking this dish, I’ve had my fair share of experiences in the kitchen. I’ve had some failed attempts at perfecting this recipe, but I’ve learned from my mistakes and have come up with a foolproof recipe that’s sure to please. One thing I’ve learned is that the key to making a great Fried Chicken Sandwich is all in the marinade. The buttermilk tenderizes the chicken and adds a tangy flavor that pairs perfectly with the crispy breading.
Speaking of breading, I’ve found that adding cornmeal to the flour mixture really takes this sandwich to the next level. It adds a subtle crunch and a slightly sweet flavor that complements the savory chicken.
But let me tell you, the best part of this sandwich is the way it looks and smells when it’s prepared. The chicken is a beautiful golden-brown color with a crispy texture that’s impossible to resist. The aroma of the chicken frying in the oil is tantalizing and will have your mouth watering in no time. When you finally take a bite of this sandwich, you’ll be transported to a state of pure bliss. The juicy chicken, creamy cheese, and fresh toppings all come together to create a flavor explosion in your mouth.
So, there you have it folks, my recipe for the Southern Comfort Fried Chicken Sandwich. It’s a classic dish with a comforting twist that’s perfect for any occasion. Whether you’re feeding a large family or just looking for a satisfying lunch, this sandwich is sure to please. So, put on your apron, heat up the oil, and get ready to indulge in some seriously good food.
The Ingredients
Ingredients (serves 4):
4 boneless, skinless chicken breasts
2 cups buttermilk
2 cups all-purpose flour
1/2 cup cornmeal
1 tbsp garlic powder
1 tbsp onion powder
1 tbsp paprika
1 tsp salt
1 tsp black pepper
1/2 tsp cayenne pepper
2 eggs
1/4 cup milk
Vegetable oil, for frying
4 brioche buns
4 slices of cheddar cheese
4 slices of tomato
4 leaves of lettuce
Pickles, to serve
Mayonnaise, to serve
The Directions
Place the chicken breasts in a bowl and pour the buttermilk over them. Make sure they are fully coated. Cover and refrigerate for at least 2 hours or overnight. This recipe makes 4 sandwiches, but you can easily double or halve the ingredients to make more or fewer sandwiches.
In a separate bowl, combine the flour, cornmeal, garlic powder, onion powder, paprika, salt, black pepper, and cayenne pepper.
In another bowl, whisk together the eggs and milk.
Heat the vegetable oil in a large skillet or deep fryer to 350°F.
Remove the chicken breasts from the buttermilk and shake off any excess. Dip each chicken breast in the flour mixture, then the egg mixture, and then the flour mixture again.
Fry the chicken in the hot oil until golden brown and cooked through, about 6-8 minutes per side. Drain on paper towels.
Assemble the sandwiches by placing a chicken breast on a brioche bun, topped with a slice of cheddar cheese, a slice of tomato, a leaf of lettuce, and a dollop of mayonnaise. Serve with pickles on the side. This recipe makes 4 sandwiches, but you can easily adjust the quantities to make more or fewer sandwiches.
This recipe is easy to follow and results in a delicious and satisfying meal. The buttermilk marinade and crispy breading make the chicken juicy and flavorful, while the toppings and bun add freshness and texture. You can serve these sandwiches for a family dinner or a weekend lunch, and adjust the quantities to suit your needs. Enjoy!