Sweet and Spicy Korean BBQ Skewers: A Perfect Dish for Sharing

As a mom of three, I’m always on the lookout for delicious and easy-to-make meals that my whole family will enjoy. Korean BBQ has been a favorite in our household for years, and I’m excited to share my recipe for Sweet and Spicy Korean BBQ Skewers with you!

I’ll admit, my first few attempts at making Korean BBQ were a disaster. I overcooked the meat, the marinade was too salty, and the vegetables were either raw or burnt to a crisp. But I refused to give up! I kept experimenting with different ingredients and techniques until I finally found the perfect balance of flavors and textures.

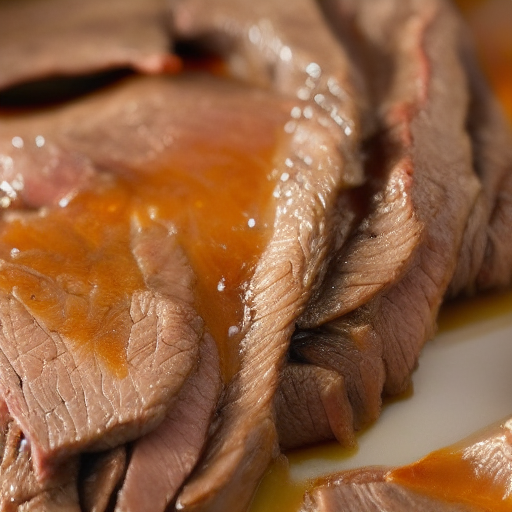
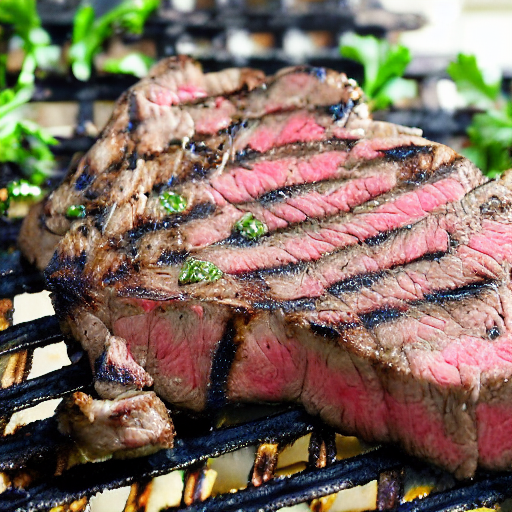
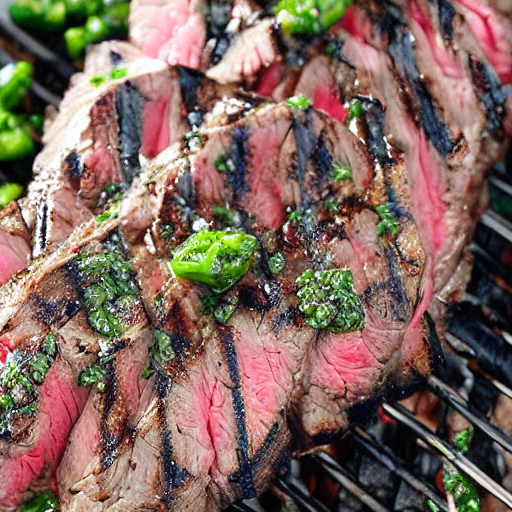
Now, my Sweet and Spicy Korean BBQ Skewers are a staple in our family’s dinner rotation. The marinade is a delicious combination of soy sauce, gochujang, honey, rice vinegar, sesame oil, garlic, ginger, and black pepper, which infuses the chicken with a rich umami flavor that’s both sweet and spicy. The bell peppers and red onion add a fresh crunch and a pop of color, making the skewers as visually appealing as they are delicious.

I love that this dish is easy to customize and perfect for sharing. Whether you’re hosting a summer barbecue or a cozy night in with the family, Sweet and Spicy Korean BBQ Skewers are a great way to bring people together. Plus, the leftovers (if there are any) make for a delicious lunch the next day.

So, if you’re looking for a new recipe to add to your repertoire, give Sweet and Spicy Korean BBQ Skewers a try! I promise it’s worth the effort, and your taste buds (and family) will thank you.

This isn’t just food, it’s an experience.

The Ingredients

  • 2 pounds boneless, skinless chicken thighs, cut into 1-inch pieces
  • 1/2 cup soy sauce
  • 1/4 cup gochujang (Korean chili paste)
  • 1/4 cup honey
  • 2 tablespoons rice vinegar
  • 2 tablespoons sesame oil
  • 2 tablespoons minced garlic
  • 2 tablespoons grated ginger
  • 1 teaspoon black pepper
  • 2 red bell peppers, cut into 1-inch pieces
  • 2 green bell peppers, cut into 1-inch pieces
  • 1 red onion, cut into 1-inch pieces
  • 8-10 bamboo skewers, soaked in water for at least 30 minutes

This recipe makes enough for 4 people. To make more or less of this recipe, you can adjust the ingredients accordingly, keeping in mind the ratio of marinade to meat and vegetables.

The Directions

  1. In a large bowl, whisk together the soy sauce, gochujang, honey, rice vinegar, sesame oil, garlic, ginger, and black pepper.
  2. Add the chicken pieces to the marinade, making sure each piece is coated. Cover and refrigerate for at least 2 hours or up to overnight.
  3. Preheat a grill or grill pan to medium-high heat.
  4. Thread the marinated chicken, bell peppers, and red onion onto the skewers, alternating between chicken and vegetables.
  5. Grill the skewers, turning occasionally, until the chicken is cooked through and the vegetables are tender and slightly charred, about 10-12 minutes.
  6. Serve hot with steamed rice and your favorite Korean side dishes.

Note: These ingredient quantities are for four servings, but can easily be multiplied to feed a larger crowd. Simply adjust the amounts accordingly, keeping the ratio of marinade to meat and vegetables consistent.

Don’t just drool over the picture – make these skewers and taste the magic for yourself!

The Savory Lentil and Mushroom Shepherd’s Pie That Saved My Vegan Soul

Hello, fellow foodies! Today, I want to share my latest kitchen adventure with you: my Savory Lentil and Mushroom Shepherd’s Pie vegan recipe. As a vegan, I’m always on the lookout for hearty and flavorful dishes that don’t require animal products. Shepherd’s Pie has always been a favorite of mine, and I was determined to create a vegan version that was just as satisfying.

I’ve had some failed attempts in the past, where the filling was too dry, or the mashed potatoes were too runny, or the flavor just wasn’t quite right. But with some trial and error, I finally landed on the perfect recipe. The lentil and mushroom filling is rich and savory, with a deep umami flavor that’s balanced by the sweetness of the peas. The mashed potato topping is creamy and fluffy, with just the right amount of tang from the non-dairy milk.

The combination of lentils and mushrooms in the filling gives the dish a deep, savory flavor that’s both comforting and satisfying. I love how versatile the recipe is, too – you can use any kind of vegetables you have on hand to customize it to your liking. The mashed potato topping is creamy and fluffy, and the perfect complement to the hearty filling.

When I first made this dish, I was worried that it wouldn’t be filling enough or would leave me feeling unsatisfied, but I was pleasantly surprised. The lentils and mushrooms give the dish a meaty texture that’s both filling and satisfying, and the mashed potatoes add a creamy and comforting element to the dish. It’s the perfect meal for a cozy night in, and always leaves me feeling happy and content.

Over time, I’ve made a few adjustments to the recipe to make it my own – adding extra garlic, swapping in sweet potatoes for regular potatoes, and experimenting with different vegetables. But no matter how I make it, this savory Lentil and Mushroom Shepherd’s Pie always hits the spot.

So if you’re looking for a delicious and satisfying vegan meal that will leave you feeling warm and cozy, give this recipe a try. I promise it won’t disappoint.

A slice of this savory pie is like a hug in food form.

The Ingredients

For the lentil and mushroom filling:

  • 1/2 cup cooked green lentils
  • 1 tablespoon olive oil
  • 1/4 onion, diced
  • 1 clove garlic, minced
  • 1/2 cup sliced mushrooms
  • 1/4 teaspoon dried thyme
  • 1/4 teaspoon dried rosemary
  • 1/4 teaspoon smoked paprika
  • 1 tablespoon tomato paste
  • 1/2 cup vegetable broth
  • 1/4 cup frozen peas
  • Salt and pepper to taste

For the mashed potato topping:

  • 1 small potato, peeled and cubed
  • 1 tablespoon vegan butter or margarine
  • 1 tablespoon non-dairy milk
  • Salt and pepper to taste

The Directions

Lentil and Mushroom Filling:

  1. Preheat the oven to 375°F.
  2. In a skillet over medium-high heat, add olive oil, diced onions, and minced garlic. Cook until the onions become translucent, about 2-3 minutes.
  3. Add sliced mushrooms and continue to cook until the mushrooms are browned and tender, about 5-7 minutes.
  4. Add cooked lentils, dried thyme, dried rosemary, smoked paprika, and tomato paste to the skillet. Stir to combine.
  5. Add vegetable broth and frozen peas to the skillet. Bring the mixture to a simmer, and let it cook until the broth has reduced by half and the mixture has thickened, about 5-7 minutes. Season with salt and pepper to taste.

Mashed Potato Topping:

  1. Meanwhile, cook the cubed potatoes in boiling water until they are tender, about 10-15 minutes.
  2. Drain the potatoes and return them to the pot. Add vegan butter, non-dairy milk, salt, and pepper. Mash the potatoes until they are creamy and smooth.

Assembly:

  1. Spread the lentil and mushroom filling evenly into a small baking dish.
  2. Top with the mashed potatoes, spreading them evenly and making sure to cover the filling completely.
  3. Bake the shepherd’s pie for 20-25 minutes, or until the mashed potatoes are golden brown and the filling is heated through.
  4. Let the pie cool for a few minutes before serving. Enjoy your savory Lentil and Mushroom Shepherd’s Pie!

Note: Cooking times may vary depending on your oven and personal preference.

Warm your belly and your soul with a serving of this cozy and comforting vegan Shepherd’s Pie.

Cheesy, Spicy, and Oh So Nicey: The Smoky Jalapeno Mac and Cheese Recipe You Never Knew You Needed!

Mac and cheese has always been a favorite comfort food of mine, but I wanted to take it up a notch by adding some smoky and spicy flavors. That’s how I came up with this Smoky Jalapeno Mac and Cheese recipe.

I’ll admit, it took me a few tries to get the recipe just right. My first attempt was a bit too bland, so I added more cheese and spices to give it that extra kick. The smoky flavor comes from the addition of smoked paprika, which adds a delicious depth to the dish. And of course, the diced jalapeno peppers provide that perfect amount of heat that I crave in my food.

One of my favorite memories of eating mac and cheese goes back to when I was a kid. My mom used to make a version that had crispy breadcrumbs on top, which added a delicious crunch to the dish. I’ve since tried adding breadcrumbs to this recipe, but I find that I prefer it without. But that’s the beauty of mac and cheese – there are so many ways to make it your own.

I hope you enjoy this Smoky Jalapeno Mac and Cheese recipe as much as I do. It’s the perfect comfort food for any occasion, and it’s sure to please even the pickiest of eaters. Just be warned – it’s hard to resist going back for seconds!

Life is uncertain, but mac and cheese is always a good idea.

The Ingredients

  • 1 cup elbow macaroni
  • 1 tablespoon unsalted butter
  • 1 tablespoon all-purpose flour
  • 1/2 cup whole milk
  • 1/2 cup shredded cheddar cheese
  • 1/2 teaspoon smoked paprika
  • 1/4 teaspoon garlic powder
  • 1 jalapeno pepper, diced (seeds and membrane removed for less heat)
  • Salt and pepper to taste

Note: These ingredients should provide enough food for one serving. If making this recipe for more than one person, be sure to adjust the quantities accordingly.

The Directions

  1. Preheat your oven to 375°F.
  2. Cook the elbow macaroni according to package instructions until al dente, then drain and set aside.
  3. In a small saucepan over medium heat, melt the butter. Once melted, whisk in the flour and continue to whisk for 1-2 minutes, until the mixture starts to turn golden in color.
  4. Slowly pour in the milk, whisking constantly to prevent lumps from forming. Continue whisking until the mixture starts to thicken, about 2-3 minutes.
  5. Add the shredded cheddar cheese, smoked paprika, and garlic powder to the saucepan, stirring until the cheese is melted and the mixture is smooth.
  6. Stir in the diced jalapeno pepper and season the mixture with salt and pepper to taste.
  7. Add the cooked macaroni to the cheese sauce and stir until everything is well combined.
  8. Transfer the mac and cheese mixture to an oven-safe baking dish.
  9. Bake for 10-15 minutes, or until the top is golden brown and the cheese is bubbly.
  10. Remove from the oven and let cool for a few minutes before serving. Enjoy!

Note: If you prefer a more browned and crispy top, you can broil the mac and cheese for the last 1-2 minutes of baking time. Just be sure to keep a close eye on it to prevent burning.

In a world full of chaos, there’s always mac and cheese.

Spice Up Your Day with a Sweet and Spicy Jalapeno Philly Cheesesteak

Hey there! I’ve always loved burgers and hot dogs, but there’s something special about a Philly Cheesesteak. The juicy beef, the caramelized onions, the melted cheese, and the crusty roll all come together to create a sandwich that’s hard to resist. So, I decided to create my own version of this classic sandwich with a sweet and spicy twist.

I have to admit, I’ve had some failed attempts at making Philly Cheesesteaks in the past. The beef was overcooked or under-seasoned, the onions were burned, and the cheese was either too little or too much. But, I never gave up on perfecting this recipe. I experimented with different types of cheese, added new ingredients like jalapenos and honey, and adjusted the cooking time and temperature until I found the perfect combination.

Now, I’m proud to share my Sweet and Spicy Jalapeno Philly Cheesesteak recipe with you. This sandwich is bursting with flavor and texture, with the sweetness of the honey and the heat of the jalapenos complementing the savory beef and melted cheese. And, it’s easy to make, so you can enjoy it anytime.

When I think of Philly Cheesesteaks, I’m transported back to my college days, when my friends and I would hit up the local sandwich shop for a late-night snack. We’d sit outside on the curb, devouring our cheesesteaks and talking about life. Those memories are some of my favorite, and I hope that this recipe can help create some new memories for you and your loved ones.

So, grab some beef, onions, cheese, and a roll, and let’s get cooking!

Thinly sliced ribeye beef – the key to a perfect Philly Cheesesteak!

The Ingredients

For one serving of Sweet and Spicy Jalapeno Philly Cheesesteak.

  • 4 oz. thinly sliced ribeye or sirloin beef
  • 1/2 large onion, sliced
  • 1 tablespoon honey
  • 1 tablespoon hot sauce
  • 1/2 jalapeno pepper, thinly sliced
  • 2 slices provolone cheese
  • 1 small hoagie roll
  • Salt and pepper, to taste
  • 1 tablespoon olive oil

Adjust the amount of jalapeno pepper to your preferred level of spiciness.

The Directions

  1. Preheat a skillet over medium-high heat.
  2. While the skillet is heating up, place the thinly sliced beef on a cutting board and pat it dry with paper towels.
  3. Season the beef with salt and pepper to taste.
  4. Once the skillet is hot, add 1 tablespoon of olive oil to the skillet.
  5. Add the seasoned beef to the skillet and cook for 2-3 minutes per side, or until it’s browned and cooked to your desired level of doneness.
  6. Use tongs to transfer the cooked beef to a clean plate and cover it with aluminum foil to keep it warm.
  7. Add the sliced onions to the same skillet and sauté for 2-3 minutes, stirring occasionally.
  8. Add 1 tablespoon of honey and 1 tablespoon of hot sauce to the skillet and stir to combine.
  9. Return the cooked beef to the skillet and stir to combine with the onions, honey, and hot sauce.
  10. Turn off the heat and place 2 slices of provolone cheese on top of the beef and onions, letting it melt.
  11. While the cheese is melting, toast the hoagie roll in a toaster or on a griddle until it’s warm and slightly crispy.
  12. Once the cheese is melted, use a spatula to transfer the beef, onions, and melted cheese onto the toasted hoagie roll.
  13. Top with sliced jalapeno peppers and serve immediately.

Remember to handle raw meat with care and follow safe food handling practices, such as washing your hands before and after handling raw meat, keeping raw meat separate from other foods, and cooking the meat to the appropriate temperature to ensure food safety.

Enjoy your Sweet and Spicy Jalapeno Philly Cheesesteak!

Juicy beef, melted cheese, and spicy jalapenos – our Philly Cheesesteak has it all!

Decadent Dark Chocolate Dream: The Perfect Treat for Cozy Nights

As a mother of three, I am always looking for ways to treat myself and my kids with something sweet, indulgent, and comforting. That’s why I love making hot chocolate, especially during the colder months of the year. There’s just something so magical about holding a warm cup of rich and creamy hot chocolate, topped with fluffy whipped cream and chocolate shavings.

But let me tell you, it hasn’t always been easy for me to make the perfect hot chocolate. I’ve had my fair share of failed attempts, where the chocolate was either too watery, too sweet, or too bitter. But over time, I’ve learned to adjust the recipe and the ingredients to create the perfect cup of hot chocolate that I call Decadent Dark Chocolate Dream.

The key to making the perfect hot chocolate is using good quality ingredients, like whole milk, heavy cream, and dark chocolate chips. The combination of these ingredients creates a velvety texture and a deep, rich chocolatey flavor that is perfectly balanced with a hint of cinnamon.

To make my Decadent Dark Chocolate Dream, simply heat up the milk and heavy cream in a small saucepan, and whisk in the chocolate chips, cocoa powder, sugar, and cinnamon until everything is melted and well combined. Then, add a splash of vanilla extract, pour it into a mug, and top it with whipped cream, chocolate shavings, and a sprinkle of cinnamon.

I have so many fond memories of drinking hot chocolate with my kids, especially during the holidays. It’s a tradition that we’ve kept alive for many years, and I hope to continue it for years to come. Whether it’s after a long day of school or on a cozy evening by the fireplace, Decadent Dark Chocolate Dream is the perfect treat for any occasion. So go ahead and treat yourself to a warm and indulgent cup of hot chocolate – you deserve it!

You can never have too much hot chocolate – especially when it looks this good!

The Ingredients

  • 1 cup of whole milk
  • 1/4 cup of heavy cream
  • 2 tablespoons of dark chocolate chips
  • 1 tablespoon of unsweetened cocoa powder
  • 1 tablespoon of granulated sugar
  • 1/8 teaspoon of ground cinnamon
  • 1/8 teaspoon of vanilla extract
  • (optional) whipped cream topping

Note: If you prefer a sweeter hot chocolate, you can increase the amount of sugar to your liking. If you prefer a thicker hot chocolate, you can use less milk and more chocolate.

The Directions

  1. In a small saucepan, heat the milk and heavy cream over medium heat until it begins to steam.
  2. Add the dark chocolate chips, cocoa powder, sugar, and cinnamon to the saucepan. Whisk the mixture until the chocolate is melted and the ingredients are well combined.
  3. Remove the saucepan from the heat and stir in the vanilla extract.
  4. Pour the hot chocolate into a mug and top with whipped cream, chocolate shavings, and a sprinkle of cinnamon if desired.
  5. Enjoy your Decadent Dark Chocolate Dream while it’s hot and indulgent!
Take a sip and savor the deep, complex flavors of Decadent Dark Chocolate Dream.

Spicing Up My Favorite Comfort Food: Spicy Chicken Noodle Soup

Today I want to share with you my latest creation in the kitchen: Spicy Chicken Noodle Soup. As a father of three, I’m always looking for new ways to spice up classic comfort foods, and this recipe has quickly become a favorite in my household.

I have fond memories of eating chicken noodle soup as a child, especially when I was feeling under the weather. There’s something about the combination of tender chicken, soft noodles, and savory broth that makes me feel warm and cozy inside. However, as I grew older, I found myself wanting something with a bit more kick.

That’s when I decided to add a bit of heat to my favorite soup recipe. I started by adding some jalapeno peppers and red pepper flakes to the mix, and the results were fantastic. The spiciness of the jalapenos adds a whole new dimension to the soup, while the red pepper flakes give it a bit of extra kick.

Of course, as with any new recipe, there were a few failed attempts before I found the perfect balance of flavors. I found that adding too many jalapenos could overpower the other ingredients, while not using enough made the soup too bland. It took some trial and error, but I eventually found the perfect balance of heat and flavor.

Now, when I make Spicy Chicken Noodle Soup, I’m always amazed by how quickly it disappears. The aroma of the chicken and spices fills my kitchen, making my mouth water in anticipation. And when I take that first bite, I’m transported back to my childhood, but with a spicy twist.

I hope you give this recipe a try and enjoy it as much as my family and I do. It’s the perfect way to warm up on a cold day, or to enjoy as a comforting meal anytime. Don’t be afraid to experiment with the ingredients and make it your own. That’s the beauty of cooking – there are always new and exciting ways to spice up your favorite foods. Happy cooking!

Soup-ercharge your day with a bowl of this spicy goodness.

The Ingredients

  • 1/4 pound boneless, skinless chicken breast
  • 1 small carrot, peeled and chopped
  • 1 small celery stalk, chopped
  • 1/4 small onion, chopped
  • 1 small garlic clove, minced
  • 1 cup of chicken broth
  • 1/2 cup of egg noodles
  • 1/2 bay leaf
  • 1/2 jalapeno pepper, seeded and finely chopped
  • 1/8 teaspoon of red pepper flakes
  • Salt and pepper to taste
  • Olive oil for cooking

Note: This recipe makes one serving, but the ingredients can be easily multiplied to feed more people. Also, be sure to use enough chicken broth to cover all the ingredients. If the soup is too thick, you can add more broth or water as needed.

The Directions

  1. Heat a medium-sized pot over medium heat and add a splash of olive oil. Add the chopped onion and garlic and cook until the onion is translucent and the garlic is fragrant.
  2. Add the chopped carrot and celery and cook for a few minutes until they start to soften.
  3. Add the chicken broth, chicken pieces, bay leaf, and a pinch of salt and pepper. Bring the mixture to a boil, then reduce the heat and simmer for 15-20 minutes, until the chicken is cooked through and tender.
  4. Remove the chicken from the pot and shred the meat using two forks.
  5. Return the shredded chicken to the pot and add the egg noodles, jalapeno pepper, red pepper flakes, and another pinch of salt and pepper. Cook for another 8-10 minutes, until the noodles are tender.
  6. Taste the soup and adjust the seasoning as needed. Remove the bay leaf before serving.

Caution: may cause sudden outbursts of ‘mmm’ and ‘ooh’ noises.

Memories on a Plate: My Love for Chimichurri Grilled Steak

My love for BBQ and grilled foods started young, and it’s been a constant in my life ever since. I’ve always had a special place in my heart (and stomach) for a perfectly cooked steak, and this Chimichurri Grilled Steak recipe is one of my favorites.

I remember the first time I attempted to cook a steak on my own. It was a disaster. I overcooked it, and it was tough and dry. I was disappointed, but I didn’t give up. I tried again and again, experimenting with different cuts of meat, seasonings, and cooking techniques until I finally found the perfect balance.

The Chimichurri Grilled Steak recipe is a dish that I’ve been perfecting for a while now. I love the way the fresh herbs in the Chimichurri sauce complement the rich, meaty flavor of the steak. When I cook this dish, the aroma of the herbs and garlic sizzling on the grill brings back memories of backyard BBQs with my family and friends.

To make this recipe, I use a boneless ribeye steak because it’s one of my favorite cuts of meat. It’s marbled with just the right amount of fat, making it juicy and tender when grilled to perfection. The Chimichurri sauce is a blend of fresh herbs, garlic, red pepper flakes, and olive oil, which adds a fresh and herbaceous twist to the classic grilled steak.

When I first tried this recipe, I was amazed by how the Chimichurri sauce elevated the flavors of the steak. It was like I was tasting a whole new dish, and I knew I had to share it with my family and friends. Now, whenever I cook this recipe, it’s always a hit, and I feel proud to have created a dish that brings people together and creates lasting memories.

So, whether you’re a steak aficionado like me or just looking for a delicious and easy grilling recipe, I highly recommend giving this Chimichurri Grilled Steak recipe a try. It’s a dish that’s close to my heart and one that I know you’ll love too.

Take your taste buds on an adventure with this herbaceous and juicy Chimichurri Grilled Steak – the ultimate BBQ delicacy!

The Ingredients

For the Steak:

  • 1 (8 oz.) boneless ribeye steak
  • Salt and pepper to taste
  • 2 tablespoons olive oil

For the Chimichurri sauce:

  • 1 tablespoon red wine vinegar
  • 1/4 cup fresh parsley leaves
  • 1 tablespoon fresh oregano leaves
  • 1 garlic clove
  • 1/8 teaspoon red pepper flakes
  • 2 tablespoons olive oil

The Directions

Remember, this recipe is designed to serve one person, but it’s so delicious that you’ll want to make more! Simply multiply the ingredients to feed a crowd and enjoy the mouth-watering flavors of Chimichurri Grilled Steak with your loved ones.

For the Steak:

  1. Preheat a grill or grill pan to high heat.
  2. Season the steak generously with salt and pepper on both sides.
  3. Drizzle the olive oil over the steak and rub it all over the meat to coat evenly.
  4. Place the steak on the grill or grill pan and cook for 3-4 minutes per side for medium-rare, or until desired doneness is achieved.
  5. Remove the steak from the grill or grill pan and let it rest for 5 minutes before slicing.
  6. Slice the steak against the grain into thin strips and transfer to a plate.

For the Chimichurri sauce:

  1. In a food processor or blender, combine the red wine vinegar, parsley, oregano, garlic, and red pepper flakes.
  2. Pulse until the herbs and garlic are finely chopped.
  3. While the food processor or blender is running, slowly pour in the olive oil until the mixture is well combined.
  4. Spoon the Chimichurri sauce over the sliced steak and serve immediately.

Note: The steak can also be served whole instead of sliced, depending on personal preference.

There’s nothing like a perfectly grilled Chimichurri Grilled Steak to satisfy your carnivorous cravings – tender, juicy, and full of flavor!

For the Love of Peanut Butter and Chocolate: The Best Chunky Peanut Butter Chocolate Chip Cookies Recipe

There’s nothing quite like the smell of freshly baked cookies wafting through the house. It’s a smell that brings back so many memories for me, of happy times spent with my family and friends.

One of my favorite cookies to bake, and eat, are these Chunky Peanut Butter Chocolate Chunk Cookies. They are the perfect combination of sweet and salty, with a chewy texture on the inside and slightly crispy edges. The use of chunky peanut butter gives them a satisfying crunch, and the addition of big chocolate chunks takes them to the next level of deliciousness.

I remember baking these cookies with my granddaughter, and she loved helping me roll the dough into balls and press them down with a fork. We would sit and wait by the oven, watching them turn golden brown and smelling the sweet aroma that filled the kitchen.

And when they were finally ready, we would enjoy them warm out of the oven with a tall glass of cold milk. It was a simple pleasure that brought us so much joy.

Now that I’m older, I love baking these cookies for my grandkids and seeing their faces light up with excitement. It’s a tradition that I hope will continue for many years to come.

So, if you’re in the mood for a sweet treat that will transport you back to simpler times, give these Chunky Peanut Butter Chocolate Chunk Cookies a try. I promise you won’t be disappointed.

The perfect treat for any occasion: peanut butter cookies fresh out of the oven!

The Ingredients

  • 1/2 cup unsalted butter, at room temperature
  • 1/2 cup chunky peanut butter
  • 1/2 cup white granulated sugar
  • 1/2 cup packed brown sugar
  • 1 large egg, at room temperature
  • 1 teaspoon vanilla extract
  • 1 1/2 cups all-purpose flour
  • 1/2 teaspoon baking soda
  • 1/4 teaspoon salt
  • 1 cup semisweet chocolate chunks

This recipe should make approximately 12-24 cookies, depending on the size of the dough balls that are formed before baking.

The Directions

  1. Preheat your oven to 375°F (190°C).
  2. In a large mixing bowl, cream together the unsalted butter, chunky peanut butter, white granulated sugar, and packed brown sugar until smooth and creamy.
  3. Add in the egg and vanilla extract, and mix well.
  4. In a separate bowl, whisk together the all-purpose flour, baking soda, and salt.
  5. Gradually add the dry ingredients into the wet mixture, mixing until just combined.
  6. Fold in the chocolate chunks until they are evenly distributed throughout the dough.
  7. Use a cookie scoop or spoon to scoop out approximately 2 tablespoons of dough, and roll into a ball. Repeat until all the dough is used up.
  8. Place the dough balls on a parchment-lined baking sheet, spacing them about 2 inches apart.
  9. Use a fork to press down on each dough ball twice to create a crisscross pattern on the top.
  10. Bake for 10 to 12 minutes, or until the edges are golden brown.
  11. Remove from the oven and let cool on the baking sheet for 5 minutes before transferring to a wire rack to cool completely.
  12. Enjoy your freshly baked Chunky Peanut Butter Chocolate Chunk Cookies with a tall glass of cold milk.

And there you have it! A delicious recipe for Chewy Chunky Peanut Butter Chocolate Chunk Cookies that will satisfy any sweet tooth.

A towering stack of freshly baked peanut butter cookies – who’s ready to dig in?